Learn programming with Rust as first language
- Source for this book: https://github.com/deavid/lprfl
- Author: David Martínez Martí
- Blog: https://deavid.wordpress.com/
Introduction
Coding can be a daunting task to any beginner. In fact even at seniority levels, it still is for advanced concepts. As you get on your journey of learning how to code you’ll begin to find previous hard tasks as easy. At some point they will become so obvious that it gets hard to imagine how other people don’t understand them. But regardless, there will always be daunting tasks waiting for you. Programming is not about the destination, it is about the journey itself.
It’s not something that you learn, and you’re done. There’s almost an infinite amount of stuff that can be learned and used, as you gain more expertise, you’ll be able to specialize on certain types of programs and make them go the extra mile, which feels very satisfying. This field also keeps constantly evolving, so much that in 10 years the job requirements change drastically, and it might be difficult to find a job if we don’t keep learning.
If you enjoy learning and trying to do new stuff day by day, then this is for you. It will get easier over time, I promise!
From zero knowledge on programming to being able to apply to any job and hope to succeed, it takes at least 6 months with full day dedication (8 hours a day) if you’re a good learner.
To get rid of the “junior” title, you will need another 2-3 years usually. And (real) seniors have at least 8 years of experience. From there, the differences between someone with 8 or 20 years of experience tend to be very dim; it depends more on the people themselves than the experience.
The good news is that with enough dedication you can get yourself employed in record time, which for other careers requires proper study at a university, which takes several years. And you’ll be able to grow easily on the job. Getting employed is not the destination, but maybe a new beginning. There’s always a huge demand on good developers, so if you prove yourself good, even if the company doesn’t allow you to grow, there will be several companies wanting your talent and will raise the offer accordingly.
So, before taking this journey ask yourself: Is this the path I want to take? If the answer is yes, then do it! Commit and push forward to get it.
NOTE: I love oversimplifying a lot!. And I will lie in order to make things look simpler and create simple rules that don’t always work. This is done on purpose to make the experience easy to follow and add concepts slowly. I will correct these and get into specifics slowly as I feel the reader got enough knowledge to understand the whole thing.
Book Levels
I organized the book into sections called levels, following “mage” levels as in fantasy games.
These give a way to you to know how much progress you did and how far are from your goals.
Your target should be to reach the “Adept” level and be proficient with it. You could consider yourself a programmer just with that.
After this point, it’s a matter of wanting to be better. The better you are, the easier it will become to get a job. I would recommend at least reaching the Master level to be in a good position to start working.
Level: Starter
You know how to install Rust and create programs.
Level: Novice
Your programs know how to apply logic and process a lot of instructions.
Level: Apprentice
Your programs become useful, and you’re able to create your own utilities for your own use.
Level: Adept
Able to use most libraries out there and create programs that would be production grade. This could be enough for some starting junior positions in some companies.
Level: Master
Got rid of most of the blockers and brain-walls that are associated with Rust and programming. Coding complex stuff that matters, using the right tools for the job and being able to participate and contribute with the community.
Level: Grand Master
Expertise and in-depth knowledge on how Rust works. Able to follow almost all code that you came to see.
Level: Legendary
If you reach this level, better go and contribute to Rust itself!
Unfinished chapters
This Book keeps growing. A lot of chapters are still a work in progress.
I added some symbols on the titles to clarify:
- ?: Pending review and completing a bit.
- !?: Several paragraphs are still missing.
- !!?: Still mostly empty, placeholder.
Level: Starter
Here your journey begins, little mage. This book will teach you how to get started in Rust and get your magic flowing.
Shortly you’ll be able to start casting your first spells and get your programs flowing.
The initial journey is hard, but don’t despair! We’ll go little by little.
Your first programming language
This is a common question everyone asks themselves. In my opinion, Python and Rust are the two best languages to start with. While Python will give you an easier time to begin, and plenty of jobs that actually exist, Rust is going to be a bit harder to begin with, with way less jobs.
As the title suggests, I’m going to recommend Rust. Why? Lots of reasons. I believe Rust will be the language of the future, so by the time you learn it hopefully there will be jobs waiting for you.
Rust also will teach you proper coding practices. As it is stricter, it will force you into the right shape and mindset for a programmer, and not someone who stitches things together that delivers delicate programs that break in strange ways just by looking at them.
The Rust community is very friendly. You’ll have a lot of people wanting to teach you the language and help you along on this. Python is a bit of hit-and-miss, some communities might be toxic.
The documentation is solid, nicely written, and very easy to follow. The reference docs might be a bit complex to understand at first, but after the first month or two it becomes very practical.
Rust has potential to be used for anything. Web, games, embedded devices, operating systems, browsers, you name it. There are still several gaps at the moment of this writing due to the nature of Rust being so new; over time more libraries will be created and mature, so right now there are several types of applications where Rust might not be fit. For now.
Python is very powerful and is able to do most of the applications that you might want to do, and it is very quick to write and get results with it. But it has several downsides (one is performance) that are very unlikely to disappear in the next 10 or 20 years1.
In the end, it doesn’t matter that much which language you start with. As long as you can learn to code, the language isn’t that important. All languages have lots of similarities, so much that when you learn the second one it will take 99% less time than the first.
And you can’t count on learning a single language (i.e. Rust) and hope that this would be all. There are always languages that are very good at one thing, and you should learn those too. Because you don’t want to spend a week doing something in Rust that takes 1 line of Bash to do, if there’s no real reason or benefit2 for it.
So, no worries, you’ll be fine. You’ll learn other languages over the course of years and that will take less and less time as you go.
As usual, there are several companies trying to make Python faster. Some efforts are going through “compiling” typed python code with great speedups. There’s also PyPy. But the community at this point does not want a “typed Python” so I don’t see the performance being fixed in the near future.
I’ve seen someone write a full Java application for several days, trying to make it as fast as possible, and someone else came up with a Bash one liner with pipes that did the same thing 2x faster, and they basically spent 5 minutes writing the line. Use the best tool for each job. You should learn more than one programming language.
Related books
The holy Rust book
You must know that there exists a book called just “The Rust book” or “the book”.
I will (jokingly & friendly) call it here “The holy rust book”.
You can check it here: https://doc.rust-lang.org/stable/book/
The holy book is the main learning resource for Rust. It is the true starting point for learning the language and contains everything, from beginner to truly advanced. It covers the entire language (except the uses of Unsafe, that are covered in the Necronomicon… I mean, the Rustonomicon)
This guide it is not meant to replace the holy book itself, as it is very well written by experts and reviewed by the whole community.
If that’s the case, what’s the point of this then? Well, the holy book assumes some knowledge. It will rapidly grow in difficulty and will require several reads for beginners and look in other places as well to fully grasp the concepts.
Only a small part of the language will be covered here; enough to get you started, and at a slow pace enough to follow without external resources (hopefully). From time to time I’ll link to the holy book, so you can go there to read if you like, as there’s more detail.
I call it “holy” because it’s the Rust Bible (in fact some people call it that). If the holy book disagrees with me, the book is right, I’m wrong. Whatever it says, it is right. A lot of people call Rust a cult (seriously) so I pretend to extend and embrace the term to make it a funny joke.
Other Rust books
See https://github.com/sger/RustBooks
Setting up the computer
So you reached this point! I guess we’re doing it. Let’s stop the chatter and bring in the real stuff. Let’s install Rust.
Installing Rust
Get your browser and go to https://rustup.rs/. Follow the instructions there.
- For Windows, there’s a
rust-init.exethat you download and will install everything. - For Linux (my case), there’s a single command line that you copy and paste into the console.
(By the way, if you want to be a developer, you also need to make the terminal your friend)
That will be all we need to do. Congrats! You installed Rust in your machine!
Chapter 1.1 - Installationof the Holy Book contains the installation instructions.
Choosing an editor for Rust
I’m very opinionated here. Get Visual Studio Code. (not to be confused with MS Visual Studio)
People call it VS Code or just “Code”. It’s open source, supports nearly all languages, and works really, really well.
From those that code with Rust, they mainly use VS Code or Vim. And I’m not going to recommend Vim to anyone. It is an excellent program, but geared towards very senior people. So VS Code it is.
I have more than 15 years coding, and I do use VS Code. It’s great. On the other hand, I almost never use Vim: it requires a lot of investment that I don’t want to commit to.
Now, go to the extensions panel and search for “rust-analyzer” and install it. This is all you need to get the best Rust experience.

It is really important to have Rust properly installed at this point, or rust-analyzer will fail.
Your first program
Before doing anything, it is important to have a folder where you put all your programs. So go ahead and create a folder with the name you like (i.e., “programs”)1.
A few tips though:
-
Prefer to use lowercase only for the folder, no spaces. Use an underscore if you need to separate words, but I would recommend writing something short.
-
Place the folder somewhere that has a short, easy path. Don’t place it on your Desktop. On Windows, “C:" might be better as the home folder contains a path with spaces.
Now open a terminal and go to this folder.
Using cd .. and cd your_folder_name should do the trick.
If you followed my tips, this should be an easy task.
Once you’re set, run the following command:
$ cargo new learnrust
     Created binary (application) `learnrust` package
This will create a folder called learnrust, you should be able to find it with
your file explorer.
Inside, there are a few folders and files.
This is how an empty Rust program looks.
It already includes a program in src called main.rs (we’ll check out the contents later).
And it can be executed.
Do cd learnrust on the console to get into the folder, then run:
$ cargo run
The output will be similar to this:
$ cargo run
Compiling learnrust v0.1.0 (/home/deavid/git/rust/learnrust)
Finished dev [unoptimized + debuginfo] target(s) in 0.34s
  Running `target/debug/learnrust`
Hello, world!
The program has been built and executed. The program output is “Hello, world!”.
Congrats! You just wrote your first program. (more or less, hah)
If you execute “cargo run” again, then:
    $ cargo run
    Finished dev [unoptimized + debuginfo] target(s) in 0.00s
     Running `target/debug/learnrust`
    Hello, world!
Notice how something is different. At first, it compiled the program, then executed it. On the second time, it noticed that the program was unchanged, so it was run without compiling it again.
This is covered in Chapter 1.2 - Hello World! of the holy book.
What is this cargo command?
Surely you noticed that we did “cargo run” and not “rust run”. Cargo is like the swiss-army knife of Rust, it will simplify all our processes during coding, and removes a lot of stuff that we don’t need to learn.
Main things that it does:
- Instead of compiling the program with
rustc, it’s justcargo build.rustcwill need flags, and it’s a bit tricky to do right, cargo makes this super simple. - Cargo built the program in
./target/debug/or./target/release. We could run these directly, but we would need to remember to build them first.cargo rundoes this for us. - We might need to download libraries for additional stuff
(this is common in all programming languages). Instead of doing this manually,
we can declare in
Cargo.tomlwhich ones do we want, and when we docargo buildit will download anything missing automatically.
There’s much more than this, but for now this is what we will be using.
The bottom line is that we will always use cargo and forget about the other commands.
That’s fewer things to remember.
As a side note, if you installed with rustup.rs as I recommended, there’s
also a rustup command. This is used to update rust and cargo themselves.
If you need to update, just run rustup update and everything will be done
automatically.
It’s a good idea to do this once a month or so, but if you don’t do it is also fine.
Personally I use Git for everything, and I have
the folders structured as /home/deavid/git/rust/project_name.
Quick, to the IDE!
Let’s start using that nice VS Code that we installed earlier.
Open VS Code, look for the Menu File and click Open Folder....

Select the learnrust folder that cargo created.
NOTE: For myself, I find more convenient to open VSCode from the terminal.
I simplycd learnrustand runcode .. VSCode will open the folder.
Now, open the src folder using the left panel, and you’ll see the main.rs.
Double-click on it.
This is what you should see:
fn main() {
   println!("Hello, world!");
}
fn main() represents the main program.
The brackets next to it ({ and }) define where the program starts and ends.
Right now there’s only one line in the program: println!(...)
println!(...) is for printing text on the console/terminal.
The text between the parentheses is what will be printed. Notice that it’s surrounded by double quotes and these are not printed to the terminal. They’re required.
This line ends with a semicolon ; this is what marks the end of the
instruction (the command to run).
Rust does not care about the different lines, or how they look in your editor.
You can put all in one line and still will do the same thing.
VSCode will format by default when you save, so it will always look nice and tidy.
Open a new terminal inside VS Code. Go to Terminal ⇒ New Terminal:

This opens a terminal on the project folder, so you can now type there
cargo run to run the program inside this terminal panel.
As you can see we can do the same things as with an external terminal. As this is more convenient, we’ll use this from now on. There’s no difference to an external one, so if you prefer to have a separate terminal program running, it’s totally fine.
You can try to print different texts or more lines. For example:

This is not very useful, but it’s important to play around and get familiar with what we learn.
Programs are executed one line at a time. Rust will read the first line, execute the command, then go to the next line and do the same. Until it reaches the end of the program and then the program just ends.
Saving our progress
When reading this book, you’ll find lots of small recipes to try out. You can
put them in your main.rs file and execute cargo run, but soon you’ll find
that you need to delete your old code to put the new one.
And you might not want to keep removing the old code. That’s understandable!
I would prefer to have something for you to build incrementally, but sadly at this point it’s not possible. We need to learn the basics for a while before I can give you any sort of tasks. So for the next chapters, we’ll be using small programs that are easy to understand. A few lines only each time.
But you, the reader, might want to keep those samples to play around later. And avoid deleting them when trying out something new.
I have a solution for you, but you’ll have to trust me here.
Multiple binaries with Cargo
First, create the folder learnrust/src/bin/, and add a file named sample1.rs
in it.
In this file learnrust/src/bin/sample1.rs, add the following contents:
fn main() {
    println!("sample program 1");
}
Now open Cargo.toml file, and add the following lines:
[[bin]]
name = "sample1"
Your file now should look like this:
[package]
name = "learnrust"
version = "0.1.0"
edition = "2021"

# See more keys and their definitions at ...

[[bin]]
name = "sample1"

[dependencies]
With this done, we now have two programs in one project folder learnrust/.
Executing the new program
The new program we created is called “sample1”, and since we have two programs,
we now need to specify to cargo run which program to run.
If we try to execute cargo run as usual, it will fail with this:
$ cargo run
error: `cargo run` could not determine which binary to run.
Use the `--bin` option to specify a binary, or the `default-run` manifest key.
available binaries: learnrust, sample1
Please read the error messages. Carefully. 99.9% of the time we get stuck because we don’t pay attention to what the error is telling us.
To fix this, we run instead cargo run --bin sample1:
$ cargo run --bin sample1
   Compiling learnrust v0.1.0 (/home/deavid/git/rust/lprfl/learnrust)
    Finished dev [unoptimized + debuginfo] target(s) in 0.19s
     Running `target/debug/sample1`
sample program 1
Now we executed the new program.
Each time we want to add a new program, we just create another file in the
bin/ folder, add it to Cargo.toml as we just did, and voilà! We can have as
many programs as we want.
You can name your program as you want, but needs to be all letters, lowercase and must end with
.rs. It may contain numbers, but it must not begin with a number. For exampleexample1.rsis fine, but1example.rsis not. You can use underscores to separate words as well:my_program.rs. Don’t put spaces.
Executing the old program
Now, as you noticed, the old program in main.rs can no longer be executed by
running cargo run.
Instead, we will need to run cargo run --bin learnrust:
$ cargo run --bin learnrust
   Compiling learnrust v0.1.0 (/home/deavid/git/rust/lprfl/learnrust)
    Finished dev [unoptimized + debuginfo] target(s) in 0.18s
     Running `target/debug/learnrust`
Hello, world!
Level: Novice
You got your first program working! Sorcery!
Now we’ll teach you the arcane stuff that nobody knows, the dark arts of coding.
Get ready because we’ll learn lots of new spells: if, for and much more!
Your magic will get powerful very shortly.
It’s like cooking recipes, seriously
You may not be into cooking, and that’s fine. But probably you know what a cooking recipe is: nothing more than a set of steps (instructions) that if followed produce the desired result: delicious food.
A program works in the same way. It has a set of instructions that should be followed step by step to produce the desired result.
There are stupid simple cooking recipes, for example to prepare frozen pizza:
- Preheat the oven to 180ºC for 10 minutes
- Remove the pizza from the box and remove the film
- Put the pizza into the oven, on top of a tray.
- Wait 15 minutes.
- Turn off the oven, remove the pizza and serve.
And there are simple computer programs as well:
- Print one line on the console that says
Hello world! - end the program.
But a common problem in cooking recipes is that they prepare a specific amount of food. If you want more or less, you have to tweak “the program” to roughly make more or less food to meet your requirements.
In programs, we have inputs (or arguments), where we can add a value and the program will take it into account for the calculation. In recipes, this is like having a number of “people to serve” and having some formula to scale up the ingredients to get the right amount of food.
We also have conditions, which work like those recipe steps that say “cook until brown”.
There are loops, which allow us to say “do this 10 times”.
There are functions, which in recipes appears when a meal is very complicated and for a particular step says “to do the base of the cake, refer to this other recipe”. It avoids repeating ourselves every time that a set of steps we can reuse across recipes.
Of course programs can do things really complicated that are quite far from recipes, but if you’re starting to learn, this comparison will serve you to get a better grasp on how this all works.
Understanding what a program is
It might appear as a rhetorical question, but what is really a program?
In some sense, a program is a set of instructions that the computer executes in order. In our case, it will read a file and execute line by line, from the top to the bottom.
But programs are more than that.
A program can be compiled or interpreted. Interpreted programs, like Python ones, are actually reading the file and executing the lines. But compiled programs like the ones Rust does, actually create something called a “binary”.
Rust will translate all our instructions into another language called “machine code”, which is the language that our computer does understand. Then it will write the file with those instructions. This file is what we call the “binary” program.
Also, programs can interact with the computer in several ways. For example, they can accept input from the user, or communicate via the console. And they can also read arguments when they’re executed.
As part of our journey to learn programming, it is critical that we understand arguments and input/output in the console.
Program Arguments
Let’s see arguments first. When you execute a program in the console, it can accept several arguments.
An argument is basically text that we can provide a program to operate.
For example, we can open a browser from the console, passing the URL to open:
$ firefox https://google.com
The URL is an argument (or parameter) that we provided to Firefox.
In general, we provide arguments like this:
$ myprogram "argument1" "argument2" "argument3"
And just for the record, they also have “return values” which you can check in Bash1:
$ echo "hello"
$ echo $?
0
Zero indicates success. Any other number is an error.
Bash is for Linux and other Unix-alike operating systems. Windows can do this too, but in a different way.
Input and Output
A program in the console has by default three ways to communicate:
- Standard Input (stdin): This is what the user types in the console.
- Standard Output (stdout): This is where the program writes in the console.
- Standard Error (stderr): Here the program sends error messages, usually they appear in the console too.
Very weird names for something tremendously simple:
$ my_program
What is your name:      <--- this is stdout
Waldo                   <--- this is stdin (you type this)

Hello, waldo!

What is your age:
white

>> ERROR: white is not a number! Program failure. <--- this is stderr (an error message)
$
Hope this serves to explain the basics on how programs have their inputs and outputs for the user, as this will be useful later on.
Variables are like little boxes that store things inside
Printing some texts gets boring very fast. A computer does calculations for us, that’s what makes them useful.
It is possible to do simple calculations and print them, but this doesn’t have much mystery either:
#![allow(unused)]
fn main() {
 println!("{}", (2 * (1 + 5) + 3 / 7) / 2);
}
This will print 6, because it works with integers (whole numbers). Just like a regular calculator but without decimal points.
To get a decimal value just use all numbers as decimals, even if it’s 2.0:
#![allow(unused)]
fn main() {
println!("{}", (2.0 * (1.0 + 5.0) + 3.0 / 7.0) / 2.0);
}
This prints 6.214285714285714, just like a calculator with probably more digits.
You’ll notice that Rust will error out if you mix numbers without decimals with numbers that do have decimals. We’ll go into more detail on this soon. For now, just remember that if you want decimal points, they need to be in all numbers.
Again, this gets boring very easily. We need to spice it up with… variables!
If you did math school before, you probably remember equations. For example:
\[ 1+x = 2x+5 \]
These have an unknown that is \(x\) that must be resolved for. In this case it would be \(x=-4\).
If you hate math and equations, do not worry. This is just to anchor into something you know. In coding we don’t do equations. The computer is the one doing math, not us.
So do we agree that \(x\) is “something” whose value is \(-4\), right?
Ok, hold on to that idea. That is the same for variables. What is not the same is:
- We don’t have equations. We have instructions. Instructions do things like storing something or printing in the terminal.
- We don’t have unknowns, and \(x\) in this example is an unknown. In programming, we have variables. An unknown is something that we don’t know (yet), while a variable is something that always has a value, and we know it.
In Rust, we would do instead:
x = -4;
Here x is the variable. It can be any name: a, j or even a word animals.
Heck, even several words together: number_of_legs_in_a_dog.
(If you’re a cat person, feel free to set number_of_legs_in_a_cat instead)
number_of_legs_in_a_cat = 4;
I did it for you. You can thank me later.
The equals part is an operation, it means “to store”. It actually saves the value on the right (number 4) into the name of the left.
Variables should be named in
snake_case, meaning they should be all lower case, contain only English characters, and it should start by letter. Spaces are not valid1.
So now we do have a name x or number_of_legs_in_a_cat whose value is 4.
The semicolon marks the end of the instruction. This serves to tell Rust that this line is something that needs to be executed, and to avoid confusion with the next line. If we forget the semicolon, it will think that two lines are in fact one and will get confused.
If we translate this line into English it will say:
Please store the value four into the variable named
number_of_legs_in_a_cat, end of instruction.
And from this point, the computer would remember that this name equals to 4, so we could print it later:
#![allow(unused)]
fn main() {
println!("{}", number_of_legs_in_a_cat);
}
This is actually the same as doing:
#![allow(unused)]
fn main() {
println!("4");
}
So, if this is the case, why do we complicate this so much?
Well, variables will help us do much more complex programs, as they can keep track of what was the user input or other data that we are managing inside. It will make sense soon, so bear with me for now.
Actually it’s more flexible than that, Rust also allows some emojis; but for simplicity, let’s use only English alphabet.
Exercise: Printing and Formatting
So we saw that println!() does print lines in the console. Let’s practice a
bit and see other fun ways of using println!().
First, we’ll create another program which we’ll call print.rs.
Go ahead and create a new file in learnrust/src/bin/print.rs.
Add the contents:
fn main() {}
Now open Cargo.toml and add:
[[bin]]
name = "print"
Your Cargo.toml should now look like this:
[package]
name = "learnrust"
version = "0.1.0"
edition = "2021"

# See more keys and their definitions at ...

[[bin]]
name = "sample1"

[[bin]]
name = "print"

[dependencies]
We can now run this program with cargo run --bin print:
$ cargo run --bin print
   Compiling learnrust v0.1.0 (/home/deavid/git/rust/lprfl/learnrust)
    Finished dev [unoptimized + debuginfo] target(s) in 0.66s
     Running `target/debug/print`
As you can see, aside of compiling the program, this does nothing. Pretty obvious when you see the code, right? It’s almost empty.
Printing banners of text
Say we want to have some banner when the program starts. That would require multiple lines and will describe what is this program.
While it’s possible to have multiple lines in a single println!(), I don’t
recommend this. It’s hard to read and hard to write.
Instead, we’ll just use one println!() per line:
#![allow(unused)]
fn main() {
    println!();
    println!("#############################################################");
    println!("#                                                           #");
    println!("#                This is a PRINT program                    #");
    println!("#                                                           #");
    println!("#############################################################");
    println!();
    println!("Summary: This program demonstrates different");
    println!("         ways of printing text");
    println!();
}
HINT: On the piece of code above there should appear a “play” button if your browser supports JavaScript. If you click it, you can see the output of this program. The play button appears in most of the pieces of code in this book, so you don’t need to try every single program out.
Placeholders
Now, printing text is nice. But soon we will want to replace a part of the text with something we can replace later on.
For example, consider this piece of code:
#![allow(unused)]
fn main() {
    println!("The sum of 2 + 3 is {}. Isn't that great?", 2 + 3);
}
The placeholder is {}. These two characters tell Rust that “here we want to
put a value”. Then after the text, we add a comma and write down the value we
want. It can be a number, text, or like in this case, an operation.
Rut basically will do the following steps:
- It will compute the sum we wrote:
#![allow(unused)]
fn main() {
    println!("The sum of 2 + 3 is {}. Isn't that great?", 5);
}
- Replaces the placeholder with the value:
#![allow(unused)]
fn main() {
    println!("The sum of 2 + 3 is 5. Isn't that great?");
}
- Prints the text into the console:
The sum of 2 + 3 is 5. Isn't that great?
We can use more than one placeholder, just add more values at the end separated by commas:
#![allow(unused)]
fn main() {
    println!("And {} * {} is {}. Fantastic.", 4, 3, 12);
}
This prints: And 4 * 3 is 12. Fantastic.
The values must appear in the same order as the placeholders. The first value
corresponds to the first {} from the left, the second value to the second {}.
You get the idea.
If it’s empty, without text or values, it will just print a new line. This can be useful to separate parts of the output:
#![allow(unused)]
fn main() {
    println!();
}
But be careful! We cannot put values without a placeholder. This DOES NOT WORK:
#![allow(unused)]
fn main() {
println!(5 * 10);
}
HINT: Try to click the play button for the above code. It should show you the error that Rust gives for this particular code.
Instead, if we just want a value, we need to add a placeholder for it:
#![allow(unused)]
fn main() {
println!("{}", 5 * 10);
}
And of course, the number of placeholders must be equal to the number of values we added. If too many placeholders appear, it will error out:
#![allow(unused)]
fn main() {
println!("{} this placeholder does not have a value->{}", 5 * 10);
}
And in the reverse, if we have too many values, it is also an error:
#![allow(unused)]
fn main() {
println!("{}", 5, 10, 5 * 10);
}
Understanding Rust errors
Again, please read the errors carefully. They explain a lot of what is wrong.
For example, on the above code we had:
error: 2 positional arguments in format string, but there is 1 argument
 --> src/main.rs:4:11
  |
4 | println!("{} this placeholder does not have a value->{}", 5 * 10);
  |           ^^                                         ^^   ------

error: could not compile `playground` due to previous error
ALWAYS read the errors from top to bottom! Start from the first line and keep reading line by line, like a book. I know this sounds obvious, but in the console, we tend to read just the last line:
error: could not compile `playground` due to previous error
In fact, most people just reads:
error: could not compile
And forgets about anything else. I swear. Some people just reads error and
gets puzzled. Don’t be like them. Read the errors from top to bottom.
Let’s break down the error in small parts to understand what it means:
(...) 2 positional arguments in format string (...)
By “positional arguments”, Rust means that we wrote two placeholders. And
“format string” is the text to print "{} this placeholder does not have a value->{}".
(...), but there is 1 argument
And the “argument” is the value on the right of the text, in our case , 5 * 10.
So, let’s read again:
error: 2 positional arguments in format string, but there is 1 argument
Therefore, what Rust means here is:
You wrote two placeholders
{}in the text, but you only provided one value on the right:, 5 * 10
And if we keep reading (we must keep reading!), we have a nice help of what’s happening:
 --> src/main.rs:4:11
  |
4 | println!("{} this placeholder does not have a value->{}", 5 * 10);
  |           ^^                                         ^^   ------
Notice the first line: --> src/main.rs:4:11. This tells us which file has the
problem (in my case I executed this in the browser, so the file does not match
with what we have in our project). The :4:11 means line 4, character 11.
Rust is telling us exactly (down to which character) has the problem. This is
super useful!!
In the next lines, see how it is showing the line of the program that is
affected. And the characters bellow (^^ and -----) are underlining the parts
that are contributing to this error.
Error messages are super helpful! Keep reading them1. They will explain to you how to fix your program.
Each time that you reach out for help for an error and turns out that you didn’t read the error message carefully, put one coin into your “Haven’t read the error message” jar. Use the contents to invite your helper friends to a drink from time to time.
Formatting numbers
Now that I’ve been a pain in the neck for long enough about errors, let’s do something interesting again. Sorry about that, but you’ll thank me later.
Let’s say we want to print some decimal numbers. But sometimes, they’re ugly:
#![allow(unused)]
fn main() {
println!("5.0 / 3.0 = {}", 5.0 / 3.0);
}
This prints 5.0 / 3.0 = 1.66666666666666672, and it might be difficult
to read. Wouldn’t it be nice if we could round to two decimals?
Let’s see a few samples:
#![allow(unused)]
fn main() {
    println!("5.0 / 3.0 = {}", 5.0 / 3.0);
    println!("5.0 / 3.0 = {:.3}", 5.0 / 3.0);
    println!("5.0 / 3.0 = {:.2}", 5.0 / 3.0);
    println!("5.0 / 3.0 = {:.0}", 5.0 / 3.0);
}
Click on the play button and see how they are rounded to different decimal places. Also, notice that Rust rounded the number, so 1.6 becomes 2.
You can read the full documentation on formatting in here: https://doc.rust-lang.org/std/fmt/
We can also do leading zeros:
#![allow(unused)]
fn main() {
println!("10 / 2 = {:04}", 5);
}
And we can mix both together, but be careful because the leading zeros count all digits and dot. So you need more “leading zeros” to cover for the decimal places:
#![allow(unused)]
fn main() {
println!("5.0 / 3.0 = {:07.2}", 5.0 / 3.0);
}
Note that, depending on your computer and Rust version you might see more or less decimals; Also the last digits might change. This is normal. Don’t think much about it. The explanation is an advanced concept that I hope to get at later stages of this book. For now, let’s move on.
Done!
That’s it for now! Feel free to play around and try yourself.
Here’s the program completed:
fn main() {
    println!();
    println!("#############################################################");
    println!("#                                                           #");
    println!("#                This is a PRINT program                    #");
    println!("#                                                           #");
    println!("#############################################################");
    println!();
    println!("Summary: This program demonstrates different");
    println!("         ways of printing text");
    println!();
    println!("The sum of 2 + 3 is {}. Isn't that great?", 2 + 3);
    println!("And {} * {} is {}. Fantastic.", 4, 3, 12);
    println!();
    println!("5.0 / 3.0 = {}", 5.0 / 3.0);
    println!("5.0 / 3.0 = {:.3}", 5.0 / 3.0);
    println!("5.0 / 3.0 = {:.2}", 5.0 / 3.0);
    println!("5.0 / 3.0 = {:.0}", 5.0 / 3.0);
    println!();
    println!("10 / 2 = {:04}", 5);
    println!("5.0 / 3.0 = {:07.2}", 5.0 / 3.0);
    println!();
}
Remember to write save it in learnrust/src/bin/print.rs and edit Cargo.toml
as I explained on top.
Then run it with: cargo run --bin print
$ cargo run --bin print
   Compiling learnrust v0.1.0 (/home/deavid/git/rust/lprfl/learnrust)
    Finished dev [unoptimized + debuginfo] target(s) in 1.11s
     Running `target/debug/print`

#############################################################
#                                                           #
#                This is a PRINT program                    #
#                                                           #
#############################################################

Summary: This program demonstrates different
         ways of printing text

The sum of 2 + 3 is 5. Isn't that great?
And 4 * 3 is 12. Fantastic.

5.0 / 3.0 = 1.6666666666666667
5.0 / 3.0 = 1.667
5.0 / 3.0 = 1.67
5.0 / 3.0 = 2

10 / 2 = 0005
5.0 / 3.0 = 0001.67
Having fun with libraries
Doing everything by ourselves might be rewarding, but it is also tiring. It takes a lot of effort and knowledge to code a proper program that is really useful. But I like a saying that goes: “Don’t reinvent the wheel”
If you need something, it is highly probable that someone else did it already and shared it for free. Seriously. Most of the time it is just a problem of not googling enough, or using the right keywords.
People share their functions and modules as libraries called “crates” in a site called https://crates.io.
As a beginner, it is important to use as many crates as you can1. They will allow you to create interesting programs easily, giving you a good sense of progress.
The first library I want you to try is “rand”: https://crates.io/crates/rand
This crate as the name suggests creates random numbers. We need to install it in our project, and for that, notice that on the right side of the website there are Install instructions and Documentation:
So we will follow the installation instructions.
We need to open our Cargo.toml file first.
This file was created when we did cargo new.
 [package]
 name = "learnrust"
 version = "0.1.0"
 edition = "2021"

 # See more keys and their definitions at ...

 [dependencies]
 rand = "0.8.4"   # Add dependencies here
We add the new crate to this file by inserting the line rand = "0.8.4" as the instructions say just below the [dependencies].
If we execute now cargo run we get something different already:
 $ cargo run
   Compiling cfg-if v1.0.0
   Compiling ppv-lite86 v0.2.15
   Compiling libc v0.2.107
   Compiling getrandom v0.2.3
   Compiling rand_core v0.6.3
   Compiling rand_chacha v0.3.1
   Compiling rand v0.8.4
   Compiling learnrust v0.1.0 (/home/deavid/git/rust/learnrust)
    Finished dev [unoptimized + debuginfo] target(s) in 2.54s
     Running `target/debug/learnrust`
 Hello world
Cargo noticed that we have added a new dependency, so it downloaded the required libraries and compiled them too! A lot of work that didn’t require almost any manual action from our side.
The program however still does the same thing. Just installing a library is not going to make our program generate random numbers.
The simplest way to start with it is to use rand::random():
fn main() {
   let randnum: i64 = rand::random();
   println!("Hello world: {}", randnum);
}
We need to define the type of randnum this time. The reason is that this
library detects where we want to save it and creates a random number as big as
possible that does fit.
The result is:
 deavid@debian:~/git/rust/learnrust$ cargo run
    Finished dev [unoptimized + debuginfo] target(s) in 0.00s
     Running `target/debug/learnrust`
 Hello world: 1976599895379426978
 deavid@debian:~/git/rust/learnrust$ cargo run
    Finished dev [unoptimized + debuginfo] target(s) in 0.00s
     Running `target/debug/learnrust`
 Hello world: -2920297650750248329
 deavid@debian:~/git/rust/learnrust$ cargo run
    Finished dev [unoptimized + debuginfo] target(s) in 0.00s
     Running `target/debug/learnrust`
 Hello world: 8971769657686972258
 deavid@debian:~/git/rust/learnrust$ cargo run
    Finished dev [unoptimized + debuginfo] target(s) in 0.00s
     Running `target/debug/learnrust`
 Hello world: -8688429354790802443
As we can see it creates very big numbers, both positive and negative. A different random number will be generated in each run.
We could make the number non-negative and smaller by choosing u8 instead of i64:
#![allow(unused)]
fn main() {
   let randnum: u8 = rand::random();
}
This creates the following results:
 Hello world: 140
 Hello world: 215
 Hello world: 99
 Hello world: 221
Because u8 is unsigned and can hold numbers between 0 and 255 \((2^8-1)\), this is the range that we get.
We can instead ask this library for a specific range:
use rand::Rng;

fn main() {
   let mut rng = rand::thread_rng();
   let randnum: i64 = rng.gen_range(1..=100);
   println!("Hello world: {}", randnum);
}
In this case we need to create a random number generator object rng.
This will be holding the internal state of the random generator.
It needs to be mutable because the state changes as each number is generated,
so the numbers aren’t repeated every time.
The gen_range(1..=100) specifies which range of numbers to retrieve, like in
a for loop, but in this case we only get a single number, randomly.
The use rand::Rng on the top is needed to access the gen_range method.
This is what Rust calls a Trait. We will go over these later on.
Of course, don’t go crazy and import the whole site. It’s not a race to see who imports more crates. Also, as you gain more experience you should be able to keep the number of imported libraries low.
Declaring variables
Before we can store values into a variable, we need to declare it. Declaring a variable means to tell Rust to create it, we will be explaining to it that this name is something that we will be using later.
Some programming languages don’t require declaring, and just storing a value for the first time will do the trick. This is the case for Python, but not for Rust.
Anyway, it’s not a big deal. Declaring a variable is very easy, we just have to use let:
#![allow(unused)]
fn main() {
   let x;
}
This comes from the wording in math of “let x be a number…”, so we use the keyword let to announce new variable names.
A keyword is a reserved name by the programming language. So this means that you can’t have a variable named
let, becauselet let;would be confusing for Rust to understand your program.
A very simple program that makes use of variables could be:
   fn main() {
      let x;
      x = 4;
      println!("{}", x);
   }
You already know what it does. Prints 4. That’s all.
A variable can change their value at any time.
For this we need to use let mut x instead of let x, so Rust knows that we
want to mutate the value inside this variable later on (more on this later).
An example:
   fn main() {
      let mut x;
      x = 4;
      println!("{}", x);
      x = 6;
      println!("{}", x);
      x = 1;
      println!("{}", x);
   }
That will print 4, then 6, then 1.
It’s just that the variable has changed the value it
contained over time, as the program runs.
Then the println!() just reads the value at that point in time and prints
it to the terminal.
An important thing here, we have to use let mut x instead of just let x
to tell Rust that this variable is “mutable”, this means that we can change
the contents later on.
We can declare one variable per line, each one with its own let:
#![allow(unused)]
fn main() {
let x;
let y;
let z;
}
But we can’t declare these in a single let instruction. Other programming languages such as C++ allow separating them with commas, but not in Rust. We need one line for each one.
Most of the time we declare a variable we actually want to give them a value, because after all a value must always have a value at all times. So we can save a few lines and do it in one shot:
#![allow(unused)]
fn main() {
let x = 4;
let y = 3;
let z = 2;
}
So now this does two things at the same time, it declares, and it stores a value. To be clear, this is just shorter and nicer on our eyes. To the computer, it is exactly the same as if we declared first, and then we used another 3 lines to store the value. The program will be identical and will run equally fast.
Bottom line: do you prefer to see it on three lines all together or in six lines? Which one is easier to understand and read for you? Whatever is your response, that should be what you should write.
We don’t write the programs for computers, we write them for humans to understand. If you think that a particular way is easier to read and understand, go with it.
As you’ll start to notice by now, there are several ways to write a program (in fact, they’re infinite). This might feel annoying. Worse even, there’s no “right way”. There are subjectively better and worse ways, but it’s always up to humans to define what looks and feels better and come up with reasons for it.
Don’t be bothered about this, don’t think much about this. It is fine. Just write what it feels better to you personally, and you’ll be grand. Over time, you’ll learn more about how to make the code more readable, but that comes with experience. For now, let’s focus on learning this.
Exercise: Variables
In the last exercise we saw lots of ways to print, but to be fair, using placeholders doesn’t make much sense if we have to write what goes inside, right?
So in this one we’ll explore how to combine the previous things we learned with variables.
First things first, we’ll create a new program again. This time we will call it
variables.rs.
So go ahead and create it in the folder learnrust/src/bin/.
As usual, we will start with fn main() {}:
fn main() {

}
Now go to Cargo.toml and add:
[[bin]]
name = "variables"
Test that it works by running:
$ cargo run --bin variables
Hello, Waldo!
Let’s try a variation of the mythical “Hello, World!” program:
#![allow(unused)]
fn main() {
    let name = "Waldo";
    println!("Hello, {}!", name);
}
And we can try a few variables with numbers and math:
#![allow(unused)]
fn main() {
    let a = 3;
    let b = 7;
    let c = a * b;
    println!("The result of {} * {} is {}", a, b, c);
}
Let’s try to mutate one variable over and over:
#![allow(unused)]
fn main() {
    let mut x = 4;
    let a = 3;
    println!("{}", x);
    x = 6;
    println!("{}", x);
    x = 1 + a;
    println!("{}", x);
}
We can also do operations with variables:
#![allow(unused)]
fn main() {
    let x = 4;
    let a = 3;
    println!("{} + {} = {}", x, a, x + a);
}
HINT: Remember you have the play button/icon on each code block to execute these samples in your browser.
Done!
Here’s the full program:
fn main() {
    let name = "Waldo";
    println!("Hello, {}!", name);

    let a = 3;
    let b = 7;
    let c = a * b;
    println!("The result of {} * {} is {}", a, b, c);

    let mut x = 4;
    let a = 3;
    println!("{}", x);
    x = 6;
    println!("{}", x);
    x = 1 + a;
    println!("{}", x);

    let x = 4;
    let a = 3;
    println!("{} + {} = {}", x, a, x + a);
}
The output is:
Hello, Waldo!
The result of 3 * 7 is 21
4
6
4
4 + 3 = 7
Let’s try Turtle!
For learning purposes, there was a little program called turtle in the 80s for
a programming language called LOGO.
This was intended for kids to learn coding. It displayed a little turtle, and they could send commands such as:
- Move right 30 pixels.
- Move top 30 pixels.
- Move left 30 pixels.
- Move bottom 30 pixels.
And that would create a rectangle on screen.
This is fascinating for learning because there is a visual feedback on the screen. And let’s face it, the console is booooring.
In Rust, there’s a library for this and I think it’s worth exploring.
If it doesn’t work for you, or if you prefer console, just move on. I’ll have examples for everything in the console.
The library is this one: https://crates.io/crates/turtle
What we should do now is add this library as a dependency to our Cargo.toml
like this:
[dependencies]
turtle = { git = "https://github.com/sunjay/turtle.git", tag = "v1.0.0-rc.2" }
We just need to add the line1
turtle = { git = "https://github.com/sunjay/turtle.git", tag = "v1.0.0-rc.2" }
at the end of the file, just below [dependencies].
BEFORE GOING FURTHER: Please verify this does work for you. Run cargo build
on the terminal and ensure that there are no errors.
Here’s what happens on my computer after running this the first time:
$ cargo build
   Compiling lazy_static v1.4.0
   Compiling bitflags v1.3.2
   Compiling byteorder v1.4.3
   Compiling scopeguard v1.1.0
   Compiling cfg-if v0.1.10
   Compiling piston-float v1.0.1
   Compiling rand_core v0.4.2
   Compiling void v1.0.2
   Compiling adler32 v1.2.0
   Compiling downcast-rs v1.2.0
   Compiling piston-graphics_api_version v0.2.0
   Compiling same-file v1.0.6
   Compiling lzw v0.10.0
   Compiling either v1.6.1
   Compiling cty v0.2.2
   Compiling color_quant v1.1.0
   Compiling piston-texture v0.8.0
   Compiling percent-encoding v2.1.0
   Compiling scoped_threadpool v0.1.9
   Compiling read_color v1.0.0
   Compiling interpolation v0.2.0
   Compiling fnv v1.0.7
   Compiling piston-shaders_graphics2d v0.3.1
   Compiling itoa v1.0.1
   Compiling ryu v1.0.9
   Compiling svg v0.6.0
   Compiling libloading v0.6.7
   Compiling lock_api v0.3.4
   Compiling draw_state v0.8.0
   Compiling inflate v0.4.5
   Compiling piston-viewport v1.0.2
   Compiling vecmath v1.0.0
   Compiling rand_core v0.3.1
   Compiling rand_jitter v0.1.4
   Compiling raw-window-handle v0.4.3
   Compiling libc v0.2.125
   Compiling crossbeam-utils v0.8.8
   Compiling maybe-uninit v2.0.0
   Compiling crc32fast v1.3.2
   Compiling shader_version v0.6.0
   Compiling walkdir v2.3.2
   Compiling gif v0.10.3
   Compiling stb_truetype v0.3.1
   Compiling deflate v0.7.20
   Compiling num-traits v0.2.15
   Compiling memoffset v0.6.5
   Compiling libloading v0.5.2
   Compiling dlib v0.4.2
   Compiling rand_hc v0.1.0
   Compiling rand_xorshift v0.1.1
   Compiling rand_isaac v0.1.1
   Compiling crossbeam-channel v0.5.4
   Compiling rand_chacha v0.1.1
   Compiling rand_pcg v0.1.2
   Compiling gfx_core v0.9.2
   Compiling smallvec v0.6.14
   Compiling crossbeam-epoch v0.9.8
   Compiling wayland-sys v0.21.13
   Compiling glutin_egl_sys v0.1.5
   Compiling gfx_gl v0.6.1
   Compiling serde v1.0.137
   Compiling gl v0.11.0
   Compiling dirs-sys v0.3.7
   Compiling nix v0.14.1
   Compiling num_cpus v1.13.1
   Compiling memmap v0.7.0
   Compiling x11-dl v2.19.1
   Compiling raw-window-handle v0.3.4
   Compiling shared_library v0.1.9
   Compiling rand_os v0.1.3
   Compiling parking_lot_core v0.6.2
   Compiling png v0.15.3
   Compiling crossbeam-deque v0.8.1
   Compiling dirs v4.0.0
   Compiling rand v0.6.5
   Compiling osmesa-sys v0.1.2
   Compiling ordered-float v1.1.1
   Compiling approx v0.3.2
   Compiling line_drawing v0.7.0
   Compiling num-integer v0.1.45
   Compiling tiff v0.3.1
   Compiling parking_lot v0.9.0
   Compiling rayon-core v1.9.3
   Compiling xdg v2.4.1
   Compiling rusttype v0.8.3
   Compiling num-rational v0.2.4
   Compiling num-iter v0.1.43
   Compiling gfx v0.18.2
   Compiling gfx_device_gl v0.16.2
   Compiling rusttype v0.7.9
   Compiling andrew v0.2.1
   Compiling piston2d-graphics v0.35.0
   Compiling rayon v1.5.3
   Compiling glutin_glx_sys v0.1.7
   Compiling pistoncore-input v0.28.1
   Compiling serde_json v1.0.81
   Compiling wayland-commons v0.21.13
   Compiling wayland-client v0.21.13
   Compiling jpeg-decoder v0.1.22
   Compiling pistoncore-window v0.44.0
   Compiling pistoncore-event_loop v0.49.0
   Compiling wayland-protocols v0.21.13
   Compiling piston v0.49.0
   Compiling image v0.22.5
   Compiling smithay-client-toolkit v0.4.6
   Compiling piston-gfx_texture v0.40.0
   Compiling piston2d-gfx_graphics v0.66.0
   Compiling winit v0.19.5
   Compiling glutin v0.21.2
   Compiling pistoncore-glutin_window v0.63.0
   Compiling piston_window v0.105.0
   Compiling turtle v1.0.0-rc.3
   Compiling learnrust v0.1.0 (/home/deavid/git/rust/lprfl/learnrust)
    Finished dev [unoptimized + debuginfo] target(s) in 14.61s
If we run it again, it will be much shorter. This is correct:
$ cargo build
    Finished dev [unoptimized + debuginfo] target(s) in 0.03s
I had to use the Git repository and the tag v1.0.0-rc.2 because
v1.0.0-rc.3 which is the latest one crashes for me, and just specifying the
RC version doesn’t seem to be something that Cargo likes for this package.
Testing Turtle
Let’s begin by creating a file turtle_vars.rs in learnrust/src/bin/ and
place the following example code inside:
use turtle::Turtle;

fn main() {
    let mut turtle = Turtle::new();

    turtle.forward(10.0);
}
Now, remember that we have to add this program into Cargo.toml:
[[bin]]
name = "turtle_vars"
And now, let’s test this:
$ cargo run --bin turtle_vars
This should display a window like this:

If this is what you see, congrats! It works for you!
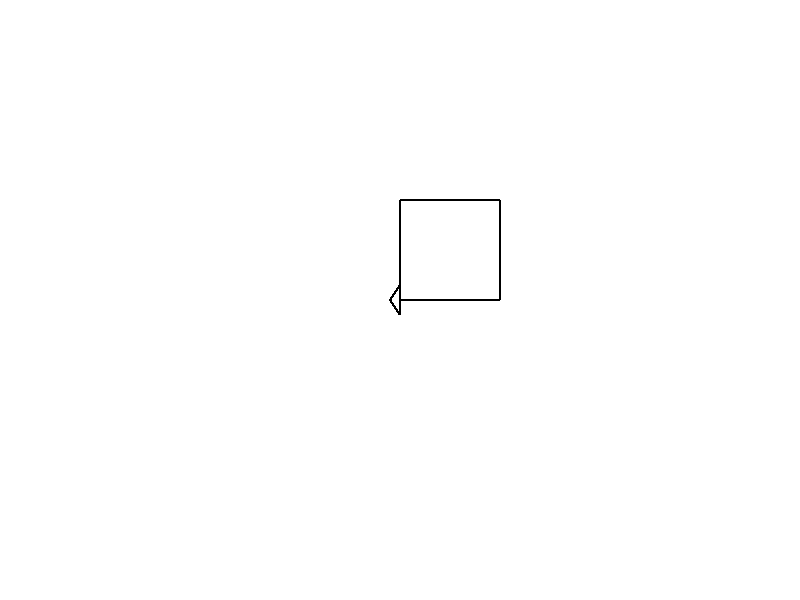
Drawing a rectangle
As explained at the beginning, we just need a few commands to do this.
Basically, we can tell the turtle to turn right while moving, and if done in four steps, we should get a rectangle:
#![allow(unused)]
fn main() {
    turtle.forward(100.0);
    turtle.right(90.0);
    turtle.forward(100.0);
    turtle.right(90.0);
    turtle.forward(100.0);
    turtle.right(90.0);
    turtle.forward(100.0);
}
And this gives us a nice animation. The end result is:
But wait! What does 100.0 mean? And 90.0?
The first one is the distance to move, the second one is the angle to turn.
So the program really says:
- Walk forward 100 pixels.
- Turn right 90 degrees.
- Now walk forward again 100 pixels.
- Turn right again 90 degrees.
- Walk again 100 pixels.
- Right by 90 degrees.
- Walk 100 pixels.
But to someone reading the program it might be confusing to understand.
Also, what if we want to make the rectangle bigger or smaller? We would need
to change the 100.0 in all four places. That’s a lot of work!2
So let’s use variables to prevent repetition:
#![allow(unused)]
fn main() {
    let distance = 100.0;
    let angle = 90.0;

    turtle.forward(distance);
    turtle.right(angle);
    turtle.forward(distance);
    turtle.right(angle);
    turtle.forward(distance);
    turtle.right(angle);
    turtle.forward(distance);
}
Nice! Now if we want to make it bigger we just change:
#![allow(unused)]
fn main() {
    let distance = 200.0;
    let angle = 90.0;
}
But what happens if we change the angle? Let’s try it out!
#![allow(unused)]
fn main() {
    let distance = 200.0;
    let angle = 120.0;
}
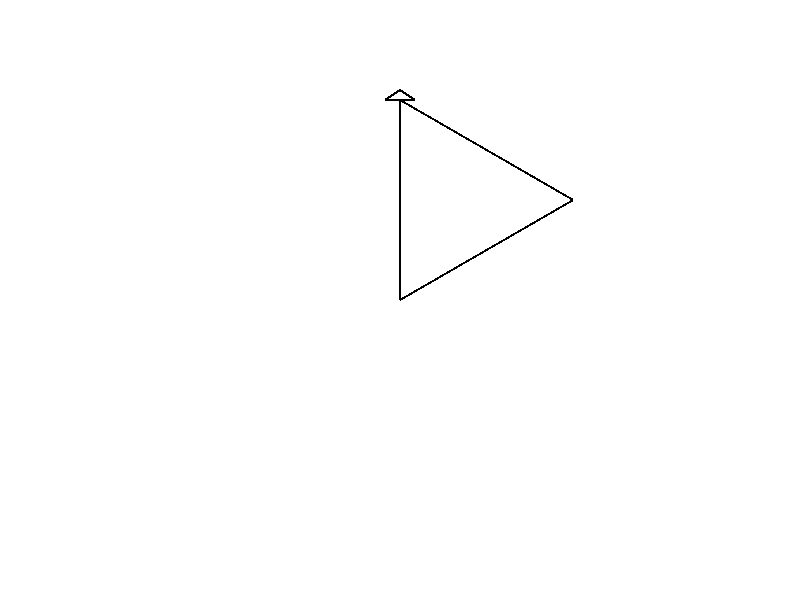
It draws a triangle! Wait, what?!
That’s because a regular polygon has their sides separated by an angle defined by:
\[angle = 360 / sides \]
And \(360/3=120\), so 120 degrees is just a triangle.
Wait a second… can we make this, so it can do different polygons?
Sure! First we copy the forward and right commands a few times more:
#![allow(unused)]
fn main() {
    let distance = 200.0;
    let angle = 120.0;

    turtle.forward(distance);
    turtle.right(angle);
    turtle.forward(distance);
    turtle.right(angle);
    turtle.forward(distance);
    turtle.right(angle);
    turtle.forward(distance);
    turtle.right(angle);
    turtle.forward(distance);
    turtle.right(angle);
    turtle.forward(distance);
    turtle.right(angle);
    turtle.forward(distance);
    turtle.right(angle);
    turtle.forward(distance);
    turtle.right(angle);
    turtle.forward(distance);
}
Now we can compute the angle by using the formula:
#![allow(unused)]
fn main() {
    let sides = 5.0;
    let distance = 200.0;
    let angle = 360.0 / sides;
}
And we get a new figure:
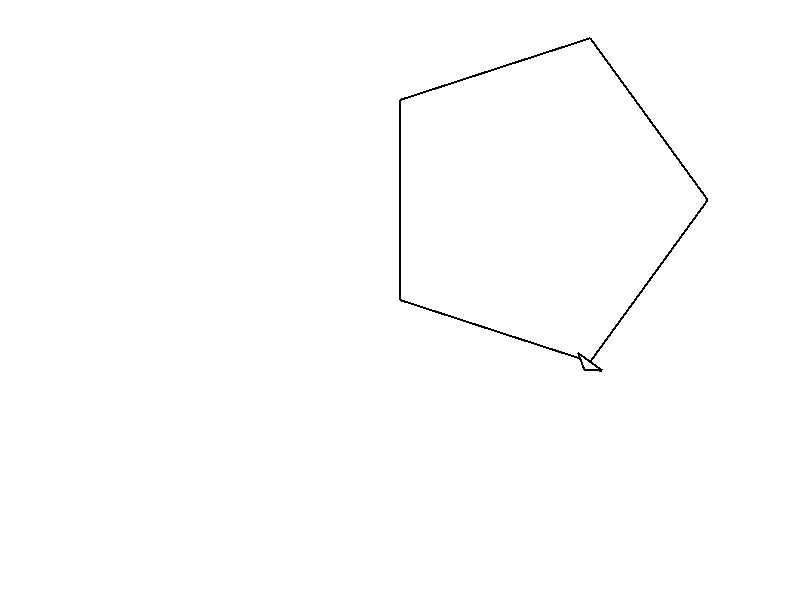
Try playing yourself with the values and see what happens each time.
- What happens if we put
sides = 10.0anddistance = 50.0? Why? - What happens if we change
angle = 300.0andsides = 8.0? - And
angle = 315.0andsides = 5.0?
Yes, we programmers are lazy. How could you have guessed that?
That’s it!
Well done. Hope you enjoyed this.
Yes, there’s still a lot of repetition in the code, but well get to that very soon.
Here’s the full program:
use turtle::Turtle;

fn main() {
    let mut turtle = Turtle::new();

    let sides = 5.0;
    let distance = 200.0;
    let angle = 360.0 / sides;

    turtle.forward(distance);
    turtle.right(angle);
    turtle.forward(distance);
    turtle.right(angle);
    turtle.forward(distance);
    turtle.right(angle);
    turtle.forward(distance);
    turtle.right(angle);
    turtle.forward(distance);
    turtle.right(angle);
    turtle.forward(distance);
    turtle.right(angle);
    turtle.forward(distance);
    turtle.right(angle);
    turtle.forward(distance);
    turtle.right(angle);
    turtle.forward(distance);
}
Incrementing and decrementing
There’s a lot of stuff we can do with variables, but a very common thing is to use them to count, so an instruction that just says “add one to X” is quite handy:
 fn main() {
   let mut x = 4;
   println!("{}", x);
   x += 1;
   println!("{}", x);
   x += 2;
   println!("{}", x);
   x += 3;
   println!("{}", x);
  }
This program will output 4, 5, 7 and 10.
The other way around, subtracting, is also possible:
 fn main() {
   let mut x = 10;
   println!("{}", x);
   x -= 1;
   println!("{}", x);
   x -= 1;
   println!("{}", x);
   x -= 1;
   println!("{}", x);
  }
This one returns 10, 9, 8 and 7.
These operations are just a shorthand of this:
#![allow(unused)]
fn main() {
   x = x + 1;
   x = x - 1;
}
Which just means: read “x”, add one, and write the result into “x” again; overwriting the previous content.
A reminder: these are instructions, not math equations. The equals sign stores on the left the result of evaluating the right side.
Most operations you can think of that take the same form have a shortened
operator as well.
For example doubling a number is just x *= 2, which means x = x * 2.
The modulo or remainder operator
Something that is little known is that in programming we have an operator to get the remainder of a division.
For example, if we do 12 / 10 = 1, but the remainder of that division is 2.
To get the remainder we use the modulo operator %:
#![allow(unused)]
fn main() {
let v = 35;
let b = 10;
let remainder = v % b;
println!("{} % {} = {}", v, b, remainder);
}
This operator is useful when we want a value that wraps around a particular number. For example when counting time, seconds goes to 60, then back to zero.
So if we do:
#![allow(unused)]
fn main() {
let time_sec = 100322;
let seconds = time_sec % 60;
}
It will make the seconds variable to be on the range 0…60, excluding 60.
This, with the use of divisions, it can make for a very easy code to transform a lot of seconds into hours, minutes, and seconds. Here’s the recipe.
#![allow(unused)]
fn main() {
let time_sec = 100322;
let seconds = (time_sec) % 60;
let minutes = (time_sec / 60) % 60;
let hours =   (time_sec / 60 / 60) % 24;
let days =    (time_sec / 24 / 60 / 60) % 30;
let months =  (time_sec / 30 / 24 / 60 / 60) % 12;
let years =   (time_sec / 12 / 30 / 24 / 60 / 60);
}
NOTE: The operator actually computes the modulo, not the remainder, which is almost the same, but not identical. For negative values it behaves differently.
Looping’ around
I’m sure you feel that variables don’t do that much. But that’s because the programs we can write up to now are too linear and simple. We need to step up the game with… loops!
Loops are ways of repeating the same piece of code several times without need of copying and pasting. For example, imagine we want to make a simple program that counts from 1 to 100:
fn main() {
   println!("Number {}", 1);
   println!("Number {}", 2);
   println!("Number {}", 3);
   // ...
   println!("Number {}", 98);
   println!("Number {}", 99);
   println!("Number {}", 100);
 }
As you can imagine, this gets tedious very easily. Copying, pasting and changing all the numbers manually is cumbersome.
Presenting… the for loop!
fn main() {
   for number in 1..=100 {
       println!("Number {}", number);
   }
 }
This program does exactly the same thing in just three lines! Amazing, isn’t it? Now variables are actually being useful.
The syntax for this is as follows1:
#![allow(unused)]
fn main() {
for variable_name in first_number..=last_number
}
We are asking the program to have a variable that counts from 1 to 100.
The current count number will be stored in the variable number
(which we can name it as we like).
The ..= in between the numbers defines a range.
The equals on the right means that it includes the right number.
There also exists .. which does not include the last number
(i.e., 0..100 counts from 0 to 99).
We can also put a loop inside a loop, so we can count in two directions. This could be useful to describe all positions in a chess board:
fn main() {
   for row in 1..=8 {
       for column in 1..=8 {
           println!("Row {}, Column {}", row, column);
       }
   }
 }
And of course, there’s no limit. You could put three or ten loops one inside another. The limit is your imagination here!
In this code, it will first pick a row, then go over all the columns. When the program finishes all 8 columns, it will proceed with the next row.
As usual, I’m lying, and it’s not the real syntax. For loops are way more powerful than this; we’ll get to that later.
Exercise: loops
Do you know Fibonacci numbers? These are a sequence in math that go:
0, 1, 1, 2, 3, 5, 8, 13, 21, 34, 55, 89, 144,...
Each number in this list has to be the sum of the previous two numbers.
We start with zero and one and begin adding them together:
0 + 1 = 1
1 + 1 = 2
1 + 2 = 3
2 + 3 = 5
3 + 5 = 8
But why Fibonacci numbers? Well, they’re easy to calculate. Nothing too fancy.
Also, they are closely related to lots of stuff in math. The golden ratio. The pascal triangle. The rate at which vampires (and bunnies) breed. The size of an A4. The binomial distribution.
https://en.wikipedia.org/wiki/Fibonacci_number
Let’s make a program that calculates several thousands of these!
Yeah, exciting. I know.
Again, let’s make a new binary fibonacci.rs inside src/bin/ and add
a fn main() {}.
Also, in Cargo.toml, remember to add:
[[bin]]
name = "fibonacci"
At some point, I’ll stop telling you to do these steps. Don’t forget to do this!
Let’s create the main thingy
So we know we want lots of numbers and a loop.
First, let’s do it without a loop for 2 or 3 numbers.
#![allow(unused)]
fn main() {
    let n1 = 0;
    let n2 = 1;
    println!("{} {}", n1, n2);

    let n3 = n1 + n2;

    println!("{}", n3);

    let n1 = n2;
    let n2 = n3;

    let n3 = n1 + n2;

    println!("{}", n3);
}
We first define n1 and n2 as the initial numbers \(0,1\). This part is what
initializes the Fibonacci.
Then we compute n3 = n1 + n2. Each number is the sum of the last two.
In the next step we need to move the numbers to the left, so n3 becomes n2
and n2 becomes n1. And then we can compute n3 again.
However, the order here matters. If we first move n3 into n2, we will lose
the contents in n2.
Instead, we need to move first n2 to n1 to avoid losing any data.
Now onto the loop!
We make the n1 and n2 variables mutable and keep everything in a loop:
#![allow(unused)]
fn main() {
    let mut n1 = 0;
    let mut n2 = 1;
    println!("{} {}", n1, n2);
    for _ in 0..10 {
        let n3 = n1 + n2;

        println!("{}", n3);

        n1 = n2;
        n2 = n3;
    }
}
That’s it! We have Fibonacci numbers!
It’s really fast, right?
NOTE: We had to use the
mutkeyword to indicate to Rust that we want to be able to change the contents of a variable. Otherwise, the compiler would complain.
But it’s hard to read. Let’s do something about it. What if we print 10 per line?
#![allow(unused)]
fn main() {
    let mut n1 = 0;
    let mut n2 = 1;
    print!("{},{},", n1, n2);
    for _ in 0..10 {
        for _ in 0..10 {
            let n3 = n1 + n2;

            print!("{},", n3);

            n1 = n2;
            n2 = n3;
        }
        println!()
    }
}
Oh no…
0,1,1,2,3,5,8,13,21,34,55,89,
144,233,377,610,987,1597,2584,4181,6765,10946,
17711,28657,46368,75025,121393,196418,317811,514229,832040,1346269,
2178309,3524578,5702887,9227465,14930352,24157817,39088169,63245986,102334155,165580141,
thread 'main' panicked at 'attempt to add with overflow', src/bin/fibonacci.rs:45:22
note: run with `RUST_BACKTRACE=1` environment variable to display a backtrace
What happened here?
Turns out that our numbers are getting too big, and they don’t fit.
By default, Rust is using 32bits (4 bytes) for each number, so they can hold any number up to \(2^{31} = 2147483648\).
We could tell Rust to use 64bit instead, but no. We’ll be using floating points.
Floating points have less precision than integers, but they can cover numbers way bigger and way smaller than integers themselves.
All that we need to do is add a decimal place to n1 and n2:
#![allow(unused)]
fn main() {
    let mut n1 = 0.0;
    let mut n2 = 1.0;
    print!("{},{},", n1, n2);
    for _ in 0..10 {
        for _ in 0..10 {
            let n3 = n1 + n2;

            print!("{},", n3);

            n1 = n2;
            n2 = n3;
        }
        println!()
    }
}
Yay! That worked!
0,1,1,2,3,5,8,13,21,34,55,89,
144,233,377,610,987,1597,2584,4181,6765,10946,
17711,28657,46368,75025,121393,196418,317811,514229,832040,1346269,
2178309,3524578,5702887,9227465,14930352,24157817,39088169,63245986,102334155,165580141,
267914296,433494437,701408733,1134903170,1836311903,2971215073,4807526976,7778742049,12586269025,20365011074,
32951280099,53316291173,86267571272,139583862445,225851433717,365435296162,591286729879,956722026041,1548008755920,2504730781961,
4052739537881,6557470319842,10610209857723,17167680177565,27777890035288,44945570212853,72723460248141,117669030460994,190392490709135,308061521170129,
498454011879264,806515533049393,1304969544928657,2111485077978050,3416454622906707,5527939700884757,8944394323791464,14472334024676220,23416728348467684,37889062373143900,
61305790721611580,99194853094755490,160500643816367070,259695496911122560,420196140727489660,679891637638612200,1100087778366101900,1779979416004714000,2880067194370816000,4660046610375530000,
7540113804746346000,12200160415121877000,19740274219868226000,31940434634990100000,51680708854858330000,83621143489848430000,135301852344706760000,218922995834555200000,354224848179262000000,573147844013817200000,
Okay, I know. This is not really helpful. This program might be somewhat helpful to some mathematician, but not for you and not for me either.
But we have to endure these silly examples for now. At our current level it is very hard to find anything to do that it’s actually possible with what I explained so far.
It is important to practice. And these examples will help you get an idea on how the syntax works.
Turtle: loops
We had this program:
use turtle::Turtle;

fn main() {
    let mut turtle = Turtle::new();

    let sides = 5.0;
    let distance = 200.0;
    let angle = 360.0 / sides;

    turtle.forward(distance);
    turtle.right(angle);
    turtle.forward(distance);
    turtle.right(angle);
    turtle.forward(distance);
    turtle.right(angle);
    turtle.forward(distance);
    turtle.right(angle);
    turtle.forward(distance);
    turtle.right(angle);
    turtle.forward(distance);
    turtle.right(angle);
    turtle.forward(distance);
    turtle.right(angle);
    turtle.forward(distance);
    turtle.right(angle);
    turtle.forward(distance);
}
Now, use loops to make it easier to read and less copy-paste.
use turtle::Turtle;

fn main() {
    let mut turtle = Turtle::new();

    let sides = 5.0;
    let distance = 200.0;
    let angle = 360.0 / sides;
    for _ in 0..30 {
        turtle.forward(distance);
        turtle.right(angle);
    }
}
As you can see, loops are very useful to avoid repeating. But also, don’t forget that the number of “loops” that happen doesn’t need to be fixed.
We can use variables, user input, and other stuff to determine for how long to loop.
Adding some comments
The programs are sometimes hard to understand, and it would be nice to leave some notes for the people reading it, so they can understand it too. And I bet you that you’ll forget what a program does after 3 months, even if you wrote it yourself. It happens to me too. So it’s good to have some notes on the program, so we can understand it later.
They can also be used to denote that some work is yet missing
(we call these TODO) so it serves as a reminder for later on.
But we all know that we will never get to do them.
That’s how it works in reality, trust me.
fn main() {
   // Compute all the cells in a Chess Board:
   for row in 1..=8 {
       for column in 1..=8 {
           // TODO: For now just display the numbers, we'll fix this ""later"".
           println!("Row {}, Column {}", row, column);
       }
   }
 }
Most comments use the double slash //.
When Rust sees this, it ignores any text on the right side of it,
so we can use this to add our thoughts on the program.
However, if you need to comment out a lot of lines,
adding // to every line can be daunting.
VS Code has shortcuts for this (and you can customize them) so it’s easier.
But Rust also has comment blocks.
A comment block starts with /* and ends with */.
Rust will ignore everything in the middle, even if there are multiple lines.
/*fn main() {
   for row in 1..=8 {
       for column in 1..=8 {
           println!("Row {}, Column {}", row, column);
       }
   }
 }*/
Voilà. Now we no longer have any program. From Rust’s perspective, the file is empty.
But these comment types are a bit trickier. They cannot be nested. If you try to add a block comment on something that already contains a comment block inside, Rust will get confused.
Because of this, I prefer to avoid these and stick with the simple and reliable double slash (//).
What If…?
…it is raining outside? You should get an umbrella, right?
This is basically a conditional: If it’s raining, get an umbrella. We have these in Rust and use the keyword “if”. The name may not sound original at all, but helps to read the program as if it were English.
For example:
fn main() {
   let apples = 6;
   if apples > 1 {
       println!("You have many apples!");
   }
 }
This program will print You have many apples! only if the
apples variable is bigger than one.
Of course, it only changes if you manually go and change the variable value. Don’t go that fast! We’ll see something useful soon.
The syntax is:
#![allow(unused)]
fn main() {
if condition {
    // ... what to do if the condition is true ...
} else {
    // ... what to do if it's not ...
}
}
Condition can be anything that is either true or false. Some examples:
apples == 1→ ifapplesis exactly 1.apples != 1→ if it’s not 1. Any other value except one will do.apples >= 1→ if it’s greater or equal to 1.apples < 1→ if it’s less than 1.apples <= 1→ if it’s less than or equal to 1.
Notice how I told you the if has an else part, but I did not
write it on the above program. That’s because it’s optional.
If we only care about the part it’s true, the else is not needed.
However, we cannot do the reverse. You cannot have an else without an if.
If we need to target when the condition is false, we need to reverse the
condition, so it returns true when we need to.
Let’s see an example with an else:
fn main() {
   let apples = 1;
   if apples > 1 {
       println!("You have many apples!");
   } else {
       println!("Please go to the supermarket.");
   }
 }
Ok, enough of this. I guess it’s too simple, and we need to spice it up with…
For loops again!
Yay! Wait, I thought you were excited about this.
Let’s do something useful. This program will graph the function \(y = x^2\frac{1}{20} - 9\) in the terminal:
fn main() {
   for y in -10..10 {
       for x in -30..30 {
           let value = x * x / 20 - 9;
           if value >= y {
               print!(" ");
           } else {
               print!("#");
           }
       }
       println!();
   }
}
As you can see, it only uses “for” and “if”. It might look complicated, but with a bit of work you should be able to follow it.
For the record, this is the output it produces:
$ cargo run
Finished dev [unoptimized + debuginfo] target(s) in 0.00s
    Running `target/debug/learnrust`


                      #########
                    #############
                   ###############
                  #################
                 ###################
                #####################
               #######################
              #########################
             ###########################
            #############################
            #############################
           ###############################
          #################################
          #################################
         ###################################
         ###################################
        #####################################
        #####################################
You can change the formula in let value = x * x / 20 - 9, and it will graph
whatever math function you like.
I know, there’s a lot to unpack here. I’ll go step by step. But first, for the avid readers, yes the function appears mirrored upside down. This is because the first line that is drawn first is in math the bottom one, and computers draw top to bottom while in math the Y axis goes from bottom to top.
It can be fixed, but to keep things simple I prefer to keep this bug in.
Let’s go first on the inner code of the loops:
#![allow(unused)]
fn main() {
let value = x * x / 20 - 9;
if value >= y {
    print!(" ");
} else {
    print!("#");
}
}
This computes \(x²\) by doing x * x, divides by 20 and then subtracts 9.
Rust has a pow() function to do \(x²\) instead of x * x, but to keep
it simple I avoided it. Anyway, this gets stored into the value
variable and the if compares against y.
So, if it’s less than y prints a hash #, if not, it prints a space otherwise.
This is meant to fill the shape. Given the math function:
\[ y = \frac{x^2}{20} - 9 \]
It computes which “squares” are below the math function and uses the # character to fill the shape.
Notice how I used print! instead of println!. The lack of the ln
(which stands for line) makes that print not open a new line,
so it prints to the right like a typewriter.
So all that is left is to loop across all x and y squares:
#![allow(unused)]
fn main() {
   for y in -10..10 {
       for x in -30..30 {
           // ...
       }
       println!();
   }
}
So using here a nested loop we iterate through negative and positive values for both x and y.
As y is usually the vertical axis, and the terminal prints first left-to-right
and then to-to-bottom, we need to first print an entire row;
That’s why the for y appears first and the for x appears next.
After the for x is done, we need to move to the next line, so an
empty println!() will move the cursor to the next line.
Other types of loops
So far we have seen for loops. Rust has other ways of doing loops that
sometimes are better than for.
Loop
There is the infinite loop that is written by loop. But a program that has
an infinite loop never ends and might become stuck forever. Therefore,
when using these types of loops we need to make sure we break that loop at
some point.
For example:
#![allow(unused)]
fn main() {
let mut counter = 1;

loop {
    if counter < 100 {
        counter *= 2;
    }
    if counter < 130 {
        counter += 1;
    } else {
        // important to include a `break` to stop the loop at some point.
        break;
    }
    println!("counter = {}", counter);
}
println!("ended with counter = {}", counter);
}
While
The other type of loop is while and does the same as loop but has a
condition that must stay true to continue looping.
#![allow(unused)]
fn main() {
let mut counter = 1;

while counter < 20 {
    counter += 1;
    println!("counter = {}", counter);
}

println!("ended with counter = {}", counter);
}
It also allows to retrieve a value in-place on the comparison, like this:
#![allow(unused)]
fn main() {
let test = "Hello World!";
let mut chars = test.chars();

while let Some(c) = chars.next() {
    println!("c = {:?}", c);
}
}
text.chars() returns an iterator over the characters of test. Every time we
call chars.next() it returns an Option<char> that can be either Some(char)
or None.
The while loop will keep iterating until this function returns None. The
result of the Some is stored in c, and we can print each
character individually.
But I should insist on using for .. in where possible, because it tends to be
more legible:
#![allow(unused)]
fn main() {
let test = "Hello World!";

for c in test.chars() {
    println!("c = {:?}", c);
}
}
Exercise: conditionals
Turtle: Improving with loops
Turtle: Making a spiral
Level: Apprentice
Now your spells are quite powerful already, and they loop around and do some logic. This, as you have seen, creates full programs that start to make sense and are beginning to be useful.
In this phase of learning you’re going to learn what is needed to finally make useful programs. From here your programs would be good enough that you’ll be able to make your own utilities for yourself.
The code might not be pretty, but you’ll have enough tools to do a lot of interesting stuff.
You can consider this chapter to be learning your first fireball spell. Rough, but powerful and effective.
Introducing Functions
It might seem difficult to picture that sometimes the same piece of code needs to repeat in different places of the code, and it’s not a loop what I’m talking about.
The example programs I can add in this book have to be small, so we can go line by line. In reality, good useful programs have thousands of lines. It’s hard to make something really useful in twenty lines with only the basic operations we learned.
It might seem daunting to think about writing several thousand lines, but it is easier than it seems. We always start small, we keep adding pieces and after a few weeks it’s easy to have those thousand lines.
One of the applications I wrote, zzping, has nearly 7000 lines of code in it. And it has been only a hobby without much investment from my side. Programs get big very easily.
Having all those instructions inside the fn main() {...} is very hard to follow.
It’s similar to organizing stuff in your room or in the house.
If all items of your house were in a single big box, trying to find anything
there is nearly impossible, so we all use different drawers, stands and boxes
to sort the stuff, so we can locate it later.
In the same fashion, we split big programs into different files, so all related instructions that work towards a similar goal are near each other, and each file has its own tools there.
We will see later on how to split into different files (in Rust, those are called modules), but now I want to explain how to sort stuff out inside a single file.
Imagine we’re doing some sort of program that tells the user interesting stuff, and it has a menu:
fn main() {
   println!("Welcome to the Trivia program!");
   println!("------------------------------");
   println!("");
   println!("Please choose an option:");
   println!("");
   println!("    1. Tell a funny story");
   println!("    2. Show the multiplication table for a number");
   println!("    3. Show the dividing table for a number");
   println!("    4. Tell the future for a zodiac sign");
   println!("    5. Browse the cooking recipes");
   println!("    6. Exit the program");
   println!("");
   println!(" Your option:");
 }
As you can imagine, each of these options almost consists of its own program. Trying to code everything in here is going to be really confusing:
fn main() {
   println!("Welcome to the Trivia program!");
   println!("------------------------------");
   println!("");
   println!("Please choose an option:");
   println!("");
   println!("    1. Tell a funny story");
   println!("    2. Show the multiplication table for a number");
   println!("    3. Show the division table for a number");
   println!("    4. Tell the future for a zodiac sign");
   println!("    5. Browse the cooking recipes");
   println!("    6. Exit the program");
   println!("");
   println!(" Your option:");
   let option = 1; // TODO: Read the user input option and store it here.
   if option == 1 {
       println!("Here's a joke...")
       // TODO: Add jokes and a joke selector
   }
   if option == 2 {
       // TODO: Ask the user which number
       // ... compute and show the multiplication table
   }
   if option == 3 {
       // TODO: Ask the user which number
       // ... compute and show the division table
   }
   if option == 4 {
       // TODO: Add a database of zodiacs with their predictions
       // ... ask the user and show the matching one
   }
   if option == 5 {
       // TODO: Add a database of recipes
       // ... ask the user and show the matching one
   }
   if option == 6 {
       // TODO: Exit the program here
   }
   // TODO: Loop again to the beginning if option 6 wasn't chosen.
}
It would be nice if we could break the program into subprograms that do specific things, so we can call those when we need them, right?
That concept is exactly what a function is.
As usual, I’ll go back to short and stupid programs, but keep in mind the above example where they’re useful.
fn welcome() {
   println!("Welcome adventurer!");
   println!("There are lots of treasures hidden in this place.");
   println!("Oh, and there's also a princess trapped in a castle.");
   println!("");
   println!("You know what to do.");
}

fn main() {
   welcome();
   println!("End of program");
}
Here we can see a “welcome” function that prints six lines of text. What the computer does is:
- It always starts from the main function.
- Reads the
welcome()call to the function, so it jumps to the topfn welcome() - Executes the five
println! - The function ends on the
}, so it goes back where it was on main. - Reads the next line and prints “End of program”.
- Reaches the end of main (the
}) and the program ends here.
A function has two sides, the declaration and the call. The function declaration states what is the function name and what it does:
#![allow(unused)]
fn main() {
fn your_function_name() {
  // ... your code here for what this function does ...
}
}
And then you can call it as many times you want, using:
#![allow(unused)]
fn main() {
your_function_name();
}
And the key thing here is “call it as many times you want”. The function’s purpose is to be reused several times, so you don’t have to repeat your code several times.
The declaration part doesn’t need to be above or below the main(), it can be anywhere as long as it is not inside the main.
Placing it before or after the main is fine, the order doesn’t matter.
Returning values from functions
It is also possible to use a function to calculate a certain value. For example, we can calculate the number PI (\(\pi\)):
fn calculate_pi() -> f64 {
   // https://en.wikipedia.org/wiki/Leibniz_formula_for_%CF%80
   // pi/4 = 1 - 1/3 + 1/5 - 1/7 + 1/9 - ...
   let mut pi_4 = 1.0;
   let mut divisor = 3.0;
   let steps = 20_000_000;
   for _ in 0..steps {
       pi_4 -= 1.0 / divisor;
       divisor += 2.0;
       pi_4 += 1.0 / divisor;
       divisor += 2.0;
   }
   return pi_4 * 4.0;
}
fn main() {
   let pi = calculate_pi();
   println!("pi: {}", pi);
}
Note that it’s quite hard to understand how these formulas actually compute PI. You’re not alone, and this is not the purpose of this exercise. We’re only focusing on a function that returns PI, and we don’t care on how it’s done.
Again, this program might be a bit too much, but the important thing is in the first line:
#![allow(unused)]
fn main() {
 fn calculate_pi() -> f64 {
}
The arrow symbol -> indicates that this function returns a value.
f64 is which kind of value we want to return, which for this case is a
floating point number (a number with decimal places).
If we wanted to return an integer we would have used i64.
The last line of the function specifies the actual value to be returned:
#![allow(unused)]
fn main() {
   return pi_4 * 4.0;
}
Since this fraction series calculates \(\pi\) divided by four, we need to multiply it by four to get PI, and the return keyword is what signals Rust that it should exit the function at that point (it marks the end of it) and return the value on the right.
It is worth noting that while the return keyword is in most other programming
languages as well, Rust specifically has another way of writing this:
#![allow(unused)]
fn main() {
   pi_4 * 4.0
}
Just removing the return keyword and also removing the semicolon signals Rust that this is the output of that block. It behaves similar but not identical to return. For simplicity’s sake we’ll keep using return for now which could be simpler to read and understand. However, this form is actually preferred in Rust code. We will learn it in depth later on.
The next thing we should focus on is how this function is called:
#![allow(unused)]
fn main() {
  let pi = calculate_pi();
}
Notice how it is used like it was a value. Rust will call the function, get the
resulting number and replace here the function by the output value.
Then it will be stored in the variable pi.
Everything else in this program is something that we already saw before. Let me go over a few things that might seem new:
#![allow(unused)]
fn main() {
  let mut pi_4 = 1.0;
  let mut divisor = 3.0;
  let steps = 20_000_000;
  for _ in 0..steps {
}
We are using let mut here to be able to change the values of pi_4 and
divisor inside the function. Without that, Rust will not let us change
the variable contents.
Another thing that might seem strange is the number 20_000_000.
This is just 20 million, but the underscores are placed to make it easier to read.
They have no meaning to Rust.
In the for loop, you’ll notice that it says 0..steps; so this basically makes
the for count up to steps. There’s nothing special with this.
Finally, the for has as a variable underscore _.
This is because this variable is not used. We only need N steps, but we use
divisor to keep track of the position. Rust will emit warnings for unused
variables. To avoid this, we use an underscore to signal Rust we don’t need
this value.
The result of the program is:
pi: 3.1415926785904635
It’s quite close to the real thing. Of course, if you increment the number of
steps it will get closer, but the program will take a bit to run.
For those cases we can make our Rust program faster by adding
the --release flag to cargo run:
 $ cargo run --release
   Compiling learnrust v0.1.0 (/home/deavid/git/rust/learnrust)
    Finished release [optimized] target(s) in 1.00s
     Running `target/release/learnrust`
  pi: 3.1415926785904635
Programs are usually built in “debug” mode, which compiles faster, but the program runs slower. This is the preferred mode for working with our program. But when distributing our application, the “release” mode is best, as it will make the program perform at its best.
Function arguments
But what if we wanted a configurable number of steps? We can do that!
Functions can accept data when they’re called, like this:
#![allow(unused)]
fn main() {
let pi = calculate_pi(100);
}
But for this to work we need to change the function signature:
#![allow(unused)]
fn main() {
fn calculate_pi(steps: i64) -> f64 {
}
We have to specify between the parenthesis what is the variable name that will record the input value, as well as the type. Since steps won’t have any decimal places, we use “i64” instead of “f64”.
Therefore, a more complete description on the syntax for a function is:
#![allow(unused)]
fn main() {
fn function_name( input_var_name: type ) -> return_type {
    // Function code here...
}
}
Where the arguments can be omitted, and the return type can be omitted as well if we don’t use them.
It is possible as well to have many input values, just separating them by comma:
#![allow(unused)]
fn main() {
fn function_name( input1: type1, input2: type2, input2: type2 ) {
    // Function code here...
}
}
Each input variable needs to have its own type associated. We’ll see more examples on this later on.
For now, let’s see the full program changed:
fn calculate_pi(steps: i64) -> f64 {
   // https://en.wikipedia.org/wiki/Leibniz_formula_for_%CF%80
   // pi/4 = 1 - 1/3 + 1/5 - 1/7 + 1/9 - ...
   let mut pi_4: f64 = 1.0;
   let mut divisor = 3.0;
   for _ in 0..steps {
       pi_4 -= 1.0 / divisor;
       divisor += 2.0;
       pi_4 += 1.0 / divisor;
       divisor += 2.0;
   }
   return pi_4 * 4.0;
 }
 fn main() {
   for n in 1..10 {
       let steps = i64::pow(10, n);
       let pi = calculate_pi(steps);
       println!("pi: {} ({} steps)", pi, steps);
   }
 }
This program now has a loop in main() that will do 10 different calculations of PI at different precision levels.
Here’s the output:
 $ cargo run --release
   Compiling learnrust v0.1.0 (/home/deavid/git/rust/learnrust)
    Finished release [optimized] target(s) in 1.00s
     Running `target/release/learnrust`
 pi: 3.189184782277596  (10 steps)
 pi: 3.1465677471829556 (100 steps)
 pi: 3.1420924036835256 (1000 steps)
 pi: 3.1416426510898874 (10000 steps)
 pi: 3.141597653564762  (100000 steps)
 pi: 3.1415931535894743 (1000000 steps)
 pi: 3.1415927035898146 (10000000 steps)
 pi: 3.1415926585894076 (100000000 steps)
 pi: 3.1415926540880768 (1000000000 steps)
It’s important to run this with --release or it will take a bit too long to compute.
Also, it’s always mesmerizing to see how more and more digits are getting “stuck in” as the number of steps grows.
I think this variation should be self-explanatory with maybe the exception to this line:
#![allow(unused)]
fn main() {
       let steps = i64::pow(10, n);
}
This computes \(steps = 10^n\), that is, the power of 10 raised to the “n”.
For this we use the function pow that exists inside the i64 type.
The double colon operator a::b is used to access the functions inside other
libraries (or any content in fact).
Note that this function pow accepts two numbers as input and returns a number.
Data types
We have reached a point where I cannot continue to explain much more without giving you a fair bit of theory. Sorry about this, but it’s needed.
What are data types?
First: what is data? Data is just the technical term for value. The number 5 is a value and is data, and so is 2.41 or the string “Basement”.
The concept of “data types” just refers to the different kinds of values. You see, 3+5 is 8, but “Base”+“ment” is “Basement”. The sign plus (+) might work differently depending on if it is text or a number.
Some operators like dividing (/) make sense on numbers (8/2=4) but don’t make any sense on texts (“Base”/“ment” = ????).
So the primordial thing that puts data types apart is what can be done with the values, what makes sense and what doesn’t; and also what the operations actually mean.
Because, you know, computers might look like really smart, but they’re actually pretty stupid. If you do, “3”+“5” is just “35” and not “8” (because of the quotes, it is treated like text, so it gets concatenated when using the plus sign). They take everything literally, too literally. And we need to tell them what to do, step by step to a level that feels like training a monkey how to make a chocolate brownie.
There are tons of data types, you can construct your own, and you can also use other people’s types. But in general, to start, we have three basic types:
- Numbers
- Integers (which can be positive or negative, but don’t have a decimal point)
- Floating point numbers (or floats) that actually have decimal places.
- Texts, generally called “strings” in programming (at some point later I might explain where the name “string” comes from, it’s a bit funny)
- True/False types, called “boolean”, used to store the result of comparisons such as “apples > 1”.
You might be inclined to always use floating point numbers for everything, as they can do much more than regular integers. If they’re better, there’s no point in using the puny integers, right?
Well, no. Later on I will point out the different problems that floating points have. For now, just write 2.0 instead of 2 for every number, and you’re done.
Rust data types
Rust data types are however a bit more nuanced. You see, these values we want to store have to be actually recorded somewhere in your physical computer. And that will be your computer memory (RAM, or DDR if you prefer). The number 4 might not look like much, but Rust has to ask for memory from your computer in order to save the value somewhere, else it would be lost, forgotten and programs won’t run.
So the question that Rust faces is: how much memory is needed for this variable? A variable can change its value later on, for example that x=4, later on it can be x=99999999. It needs to grab enough memory in order to ensure that all values you might want to put there actually do fit.
This is why integers are split into different sizes:
- i8
- i16
- i32
- i64
Each of those is a valid Rust type for an integer. And yeah, the “i” is short for integer. The number that it follows is the number of bits that Rust will get for them.
Is 8 bits a lot? Let’s see. A computer might have 4 gigabytes of RAM. Giga just means billion. So that’s 4,000,000,000 bytes. And a byte is just 8 bits.
So this means that i8 only uses 1 byte of memory. And if a computer has 4,000,000,000 bytes, I can surely assume it can store a lot of those and still have plenty of space left. So yeah, it’s very tiny.
But this affects the range of numbers we can store. It is fine for storing -4, 12 or 81. But 355 is too much for an i8 and the program will fail. If we need to store bigger numbers, we need to use types that use more space.
For example, i16 can store up to 32,000.
But you know what? This is too complicated. Why bother? Use i64 and that’s it. Forget about the others for now and just use i64 for everything. Your computer has so much memory that it doesn’t care if a number uses 1 byte or 8.
An i64 can store any integer number up to roughly 9,000,000,000,000,000,000. Either positive or negative. Unless you want to start counting atoms, I think we have more than enough to work with. So again, let’s use i64 for all our integer numbers and forget about this conversation.
Rust also has unsigned numbers, which work exactly the same as the regular integers, but they can’t store negative numbers, Instead of “i” they go with “u” and work exactly the same:
- u8
- u16
- u32
- u64
Why limit ourselves to only positive? Well, they can hold double the numbers inside. But… why? Wasn’t 9,00… or whatever enough for us…?
Exactly. It is enough. So again, we won’t be using these. Use i64.
There are two extra integer types in Rust:
- usize
- isize
If your computer is a 64bit one, then these are equivalent to u64 and i64. But these have their specific use. We will come back later to the “usize” as it is how computers locate things in memory. Certain things such as locating an item in a list/collection of numbers use “usize”.
I’m dumping this to you now to give an approximate picture of the data types that Rust has in the hopes that you’ll begin to recognize these later on. I’ll explain this again later on with more detail, so no need to study and memorize these things now.
Floating points, very similarly have two variants for sizes:
- f32
- f64
“f” for float, and 32 or 64 for the amount of memory that they use. And guess what, we’ll use f64 when we need decimal places and forget about f32.
Boolean values (bool) only have one type:
- bool
There isn’t much secret on this type, it is quite like an integer that holds 0 for false and 1 for true. That is all.
Strings (texts) also come in two variants, but, surprise! It’s not for size!
- str
- String
The difference is a bit too nuanced to explain right now, so let’s just say they’re almost the same thing. We will use String for our variables, as it is simpler to use, but in some cases, Rust wants a “str” instead. They can be converted one to another, so it’s not a big deal.
As you might have noticed, they don’t have any specific size. So, how big can the text be inside?
Short answer: As long as you want.
They’re dynamic. Rust will request more memory when needed. So as long as your computer has enough memory to store the text, it will work1.
And those are all types we will be using for a long, long time here. So, to recap:
- Integer numbers (without decimal places): i64
- Floating point numbers (with decimal places): f64
- Strings (text): String (with the first S in uppercase)
- Boolean (true/false): bool
- Locating values inside a list: usize (we’ll see this later on)
Oh crap, I’m sorry, I’m lying way too much… I swear I will fix this mess later on. For now, bear with me, this is the explanation you need
Back to declaring variables… with type
Now that we have a rough idea on types, we can do more things with the “let” keyword.
For example, we can tell Rust to use an i64 for our number:
#![allow(unused)]
fn main() {
   let x: i64 = 2;
}
That will force the selection of this type. But wait… if we didn’t specify a type, and Rust needs one to know how much memory to use… how did Rust make the previous examples work?
As a reminder, we did:
   fn main() {
      let x;
      x = 4;
      println!("{}", x);
   }
And we did not specify a type here. In fact, this could be i8, i16, i32, i64 or even u8, u16, etc. All these will work.
Which one did select Rust and why?
Did we care which one to use when writing this? No. And neither does Rust.
Rust will do something similar to what I’m telling you to do. i64 is a
perfectly fine type for most uses, so just go with that. Rust is probably doing
the same thing here: It seems you want a number; does i64 work?
Ok, so that one then; that looks good1.
Rust does a lot of guesswork to select the type, and most of the time we don’t need to care about this. In a few particular times it might be confused with too many options that are too different, and might complain. In such cases, we need to help it by defining the type. Aside from that we’ll avoid setting the types and let Rust do its magic.
Note here that Rust might guess differently and prefer an i32 over an i64 “because it’s smaller, and it still works”. As we didn’t care about which type, it’s pointless to try to know what Rust exactly does. If we want to be sure it’s an i64, we just write it down.
dbg!() and format!()
Printing in console is nice. But sometimes we want just to quickly see what are the contents of a variable or operation.
For this we can use the dbg!() macro1:
#![allow(unused)]
fn main() {
let value = 123.0;
dbg!(value);

dbg!(1.5 * 3.2);
}
This prints:
[src/main.rs:4] value = 123.0
[src/main.rs:6] 1.5 * 3.2 = 4.800000000000001
This is quite useful! Avoids writing a lot and does what we need to understand what the code is doing at different points.
You’ll notice that the result of the multiplication is not \(4.8\). This is fine. Floating points have problems with precision and it shows. Soon enough I’ll explain. Don’t worry too much.
format!()
Here’s another case. Sometimes we want the ability that println!() gives us
regarding on composing a string, but we don’t want to print it. We want to
store it.
For this, we have the format!() macro, that works exactly as println!() but
instead of printing it returns the result as a string:
#![allow(unused)]

fn main() {
let text = format!("your lucky number is {:05}. Try another day!", 7);

dbg!(text);
}
[src/main.rs:5] text = "your lucky number is 00007. Try another day!"
Nice!
This can be used to compose texts and pass it to other functions.
You can see more examples here:
https://doc.rust-lang.org/rust-by-example/hello/print.html
1 Looks like a function, you can think of it as a function, but to be correct,
things that end with ! are called Macros. We won’t see how to make these until
very late in (if at all), as you don’t need to make macros to code 99.999% of
programs.
Converting types with explicit conversions
As you can imagine, it is pretty common having a mix of types. With so many data types it is easy to end up having an operation that needs to mix them in some way, and Rust does not allow that.
We will avoid the majority of those problems by using as few types as possible, just i64 and f64. But it will happen at some point.
For example, consider a simplistic example:
#![allow(unused)]
fn main() {
   let apples: i64 = 2;
   let apple_weight: f64 = 0.35;
   let total_weight: f64 = apples * apple_weight;
}
In this case we could define apples to be a float, and it will work,
but this could appear differently where this is not so simple,
and we need “apples” to be an integer regardless.
To make this work we can simply convert “apples” variable in the spot, right where we need it:
#![allow(unused)]
fn main() {
   let apples: i64 = 2;
   let apple_weight: f64 = 0.35;
   let total_weight: f64 = apples as f64 * apple_weight;
}
By adding as f64 we’re making what is called an “explicit conversion”.
Rust will convert the integer into a floating point on the spot
and will use that on the calculation of total_weight.
The variable apples is still an integer after that line. If we keep using
it as a float we would need to keep converting every time.
So if it is needed in all places as a float,
maybe it is better to just make it a float from the start.
Explicit conversions have their limitations though. It works only between some types that are easy for Rust to convert. You can’t use it to convert to or from strings (there are other conversion types for that), or between string types.
Doing the reverse, converting a float into an integer,
will drop any decimal places. So 2.99999 as i64 is just 2.
It will not round the number to 3.
There are other ways for rounding numbers.
The reason why explicit conversion works for so few cases and its behavior: These conversions are usually supported by your CPU and are really fast. Rounding numbers or converting an integer into a string will take several iterations in your CPU to complete. Those are also very fast, just not as fast as the explicit conversion. Rust is trying to signal you where your program might be consuming more resources, which is helpful, but we don’t need to be obsessed with speed. Rust is very fast, and so is your computer (even if old).
Exercise: explicit conversions
Now, use what you learn about doing x as f64 to fix the following program:
#![allow(unused)]
fn main() {
let x = 4
let y = 2.0;
let z = x / y;
dbg!(z);
}
We could solve in two directions:
#![allow(unused)]
fn main() {
let x = 4
let y = 2.0;
let z = x as f64 / y;
dbg!(z);
}
Or:
#![allow(unused)]
fn main() {
let x = 4
let y = 2.0;
let z = x / y as i64;
dbg!(z);
}
A tiny bit on strings
Storing and manipulating texts in a program is a bit harder to explain than numbers. This is because a computer does not work with text, but with numbers.
Surely you have heard that in a computer everything are ones and zeros (the binary system). These can be combined to create big numbers, and with some tricks the CPU can also work natively with floating point in order to have decimal places.
But text is not a number, which means that Rust needs a bit of work behind the scenes to make these work.
As a basic introduction, a text is nothing more than a sequence of letters.
The text ABC might be a string, but it also is a sequence of
three letters: A, B and C.
Each letter is a character. If we assign each possible character a number, we can in fact store text using numbers:
A→ 65B→ 66C→ 67- …
This is totally arbitrary, but there’s a standard called “ASCII” that defines a table of conversions from letters to numbers. If all programs use the same table1, then we can save those numbers into a file, and get the correct texts back when another program reads the same file.
So a string is just a list of numbers that it is conveniently interpreted as text.
Instead of the ASCII table Rust by default uses UTF8 for strings. I won’t go into much detail here, but the world has different languages with different characters. Think about Chinese, Japanese, and Russian. The ASCII table is not good for those. UTF8 is still compatible with ASCII, but it allows for a character to span multiple number entries (bytes), so we can have in the same format any kind of writing language.
To keep things simple, just assume it is ASCII for now. We’ll cover UTF later on.
Why are texts called “strings”? https://stackoverflow.com/questions/880195/the-history-behind-the-definition-of-a-string (To be completed later)
Actually they don’t, and that’s why we have so many problems with tildes, foreign characters, and the reason why UTF exists.
Simple explanation on &str vs String
We will use these soon, so they need a bit of an introduction. They both store a sequence of characters.
It all boils down to what I commented early on. Rust (and the computer itself) needs to know how big a variable is. But a string can change in size very abruptly.
Because of this, Rust cannot know the size of most strings until the program is actually executed. This poses a problem, because without a rigid size in memory we cannot have variables that contain text. At most, we can have a variable that stores a single character, but this isn’t very useful.
So what do we do? Well, instead of having the text itself in a variable
we store where the string is and its length. This is the type &str.
While this is the fastest way for the computer to do this, and convenient for
some parts of the program, it’s certainly very hard to manipulate. It’s nearly
impossible to change the contents of a &str variable.
It’s because of that inconvenience that String exists. The String type encapsulates and automates string changes.
So, in general, when a text never changes, &str is just fine. But if we want
to store the user’s input, String might be better.
In Rust these two are very easy to convert from one to another:
 fn main() {
   let s1 = "This is a &str";
   let s1a = s1.to_owned(); // This converts &str to String.
   let s2 = String::from("This is a String");
   let s2a = s2.as_str(); // This converts String to &str.
 }
We’ll go on more details later on, but for now we will basically use whatever type Rust is happier with. Depending on what we’re doing we will probably need one or the other and convert accordingly.
Note that there are lots of functions to create a String from a &str:
#![allow(unused)]
fn main() {
let s1 = "text".to_owned();
let s2 = "text".to_string();
let s3 = String::from("text");
}
They all do the same. In programming, we try to avoid having two things for the same, but in this case, Rust has to have three variants, because they can be used in different contexts.
x.to_owned()means to create an owned version of the variable; that is, to remove the&character (borrow), which we will be learning soon.x.to_string()means to convert something into a string. This is equivalent toformat!("{}", x).String::from(x)means to create a string from something else. It can only be used with &str, String or other types that actually represent text or at least a character.
Is any of those faster? Maybe. Probably String::from(). But I bet it cannot be measured in 99.9% of real Rust programs. The difference is too small to actually matter.
A bit more detailed explanation on functions
A function has always two parts, the declaration, and the call.
The declaration is this part with the fn keyword:
#![allow(unused)]
fn main() {
fn one() -> i64 {
    return 1;
}
}
Where the call is this code:
#![allow(unused)]
fn main() {
add_one();
}
You can have functions declared that are not called (you’ll get a warning), but you cannot have a function called that is not declared.
Also, we can call the same function as many times we want. It is the whole point of functions to be able to be called thousands of times.
To execute/call a function, we write the name and follow it by parenthesis:
#![allow(unused)]
fn main() {
add_one();
}
If we forget the parenthesis, the function will not be called:
#![allow(unused)]
fn main() {
add_one;  // WRONG!
}
The return value of a function can be used as a regular value:
#![allow(unused)]
fn main() {
let two = 1 + one();
let three = 1 + one() + 1;
}
Rust will execute the code in the function, get the return value and “replace” the function call with that value:
#![allow(unused)]
fn main() {
let two = 1 + (1);
let three = 1 + (1) + 1;
}
Function names are actually variables. We won’t be using this “feature” in this book, but it’s good that you know this is possible:
#![allow(unused)]
fn main() {
let one_fn = one;

let two = one_fn() + 1;
}
These are called function pointers. This is why it’s important you don’t forget the parenthesis, as the error might get you confused. Rust will understand that you want to store the function code somewhere1.
Actually they are function pointers, they point to the memory address where the code sits. But as usual, this goes outside what I want to explain.
They’re black boxes
We need to understand functions as a black box. Something goes in, something goes out. We don’t care that much on what happens inside when we call it.
You can imagine them as a microchip, that has pins for getting data in, and pins that give data out:
              ┌——————————————————┐
 number_1  -->│                  │
              │                  │
              │  add_numbers()   │---> result_number
              │                  │
 number_2  -->│                  │
              └——————————————————┘
This equates to this function:
#![allow(unused)]
fn main() {
fn add_numbers(number_1:i64, number_2:i64) -> i64 {
//     │          │             │              ↳ Return value type
//     │          │             ↳ Second argument name and type
//     │          ↳ First argument name and type
//     ↳ Function name
}
Remember: You can have functions that don’t return a value. A function that accepts one, two, or many arguments. Or both.
This function doesn’t need any arguments, and doesn’t return anything:
#![allow(unused)]
fn main() {
fn help() {
}
This one accepts one argument but doesn’t return anything:
#![allow(unused)]
fn main() {
fn manual(page: i64) {
}
This one doesn’t have arguments, yet has a return value:
#![allow(unused)]
fn main() {
fn calculate_pi() -> f64 {
}
Omitting “return”
In Rust, most of the time we don’t need to add return to return a value.
If the last statement of the function lacks a semicolon, implies return.
For example:
#![allow(unused)]
fn main() {
fn add_numbers(a: i64, b: i64) -> i64 {
    let c = a + b;
    return c;
}
}
Can be simplified as:
#![allow(unused)]
fn main() {
fn add_numbers(a: i64, b: i64) -> i64 {
    let c = a + b;
    c
}
}
Which in turn, can be simplified again:
#![allow(unused)]
fn main() {
fn add_numbers(a: i64, b: i64) -> i64 {
    a + b
}
}
Nice!
Types as matching shapes
Remember those kids toys where you have to put the rectangle on the rectangular hole, and the circle in the circular hole?
Data types are somewhat like this.
Imagine that the types were shapes:
- Integers are squares: ■
- floating points are circles: ◉
- Strings are parallelograms: ▰
Now, when you make a function, the arguments are like “sockets” you must connect:
              ┌——————————————————┐
 number_1 ○-->│                  │
              │                  │
              │  add_numbers()   │◉---> result_number
              │                  │
 number_2 ○-->│                  │
              └——————————————————┘
A function that accepts several types would look like this:
   ┌————————┐
--▢|        |
   |        |
--◎|        |
   |        |
--▱|        |
   └————————┘
You need to provide the right shapes to that box to get it working.
Or in specific terms, you need to provide the exact types the function is asking for to be able to call it.
You cannot call a function that accepts a f64 with an i64.
In the same sense, if your code is expecting an i64 as a result, the function
must return that:
fn calc_pi() -> f64 {
    // code here...
    return pi;
}

fn main() {
    let pi:i64 = calc_pi(); // Error! calc_pi returns f64 but the variable is i64.
}
Returning multiple values
We can return more than one values by using tuples. A tuple is basically several values packed together. We put in between parenthesis, and each value separated by comma.
#![allow(unused)]
fn main() {
fn default_position() -> (f64, f64) {
    return (0, 0);
}
}
To use this, we can just unpack the values upon receiving:
fn main() {
    let (x, y) = default_position();
}
If we need to specify types, we can do for each variable:
fn main() {
    let (x: f64, y: f64) = default_position();
}
But we can also receive the return value as a single tuple:
#![allow(unused)]
fn main() {
let z: (f64, f64) = default_position();
}
To use this tuple, we can access the data in order by doing z.0 or z.1:
#![allow(unused)]
fn main() {
let z: (f64, f64) = default_position();
let x = z.0;
let y = z.1;
}
There’s not much mystery to this. Tuples are good to have several values packed together. And they’re used mainly for this use case, to get multiple return values in a function.
Introduction to Closures
In Rust, it is possible to create a function without using the fn keyword.
Why would we want to have a secondary way of creating these?
Well, sometimes we need a function for something that appears just once.
Sometimes these functions are very small.
But still, this doesn’t explain why we need a secondary way of creating functions.
The real reason though, is that some functions require functions to be passed as arguments.
Wait what? You mean to call a function in a function argument?
Yeah. Nope. That’s not it. I mean the function itself, the name, before being called.
Imagine we want a function that counts stuff. But what it counts, is up to the caller to decide.
For example, given the text:
The fox jumped over the lazy dog.
We want to count the letter e.
#![allow(unused)]
fn main() {
fn count_e(text: &str) -> i64 {
    let mut count = 0;
    for c in text {
        if c == 'e' {
            count += 1;
        }
    }
    count
}
}
Okay, good. But if we want to be able to count any character that we want?
Simple, add another argument!
#![allow(unused)]
fn main() {
fn count(text: &str, what: char) -> i64 {
    let mut count = 0;
    for c in text {
        if c == what {
            count += 1;
        }
    }
    count
}
}
Yeah, we don’t see the problem yet.
But now, imagine we want also to be able to count uppercase values.
What value do we give to this function, so it can compare against many values?
We can pass a function itself!
fn count(text: &str, what: fn(char) -> bool) -> i64 {
    let mut count = 0;
    for c in text.chars() {
        if what(c) {
            count += 1;
        }
    }
    count
}

fn uppercase(c: char) -> bool {
    if c >= 'A' && c <= 'Z' {
        return true;
    }
    return false;
}

fn vowel(c: char) -> bool {
    match c {
        'a' | 'e' | 'i' | 'o' | 'u' => true,
        _ => false,
    }
}

fn main() {
    let text = "The fox Jumped over the Lazy Dog.";

    let c = count(text, uppercase);
    println!("uppercase = {}", c);
    let c = count(text, vowel);
    println!("vowels = {}", c);
}
This prints:
uppercase = 4
vowels = 9
Because we can have such functions (and the Rust library contains a few of those) we might need to create functions just to be able to call these.
And it can get cumbersome.
For example, Rust has a function char::is_alphabetic that returns true
if the character is a letter.
However, we might want to reverse it:
fn is_not_alphabetic(c: char) -> bool {
    !c.is_alphabetic()
}

fn main() {
    let is_not_alphabetic2 = |c: char| !c.is_alphabetic();

    dbg!(is_not_alphabetic('0'));
    // prints --> is_not_alphabetic('0') = true
    dbg!(is_not_alphabetic2('0'));
    // prints --> is_not_alphabetic2('0') = true

    dbg!(is_not_alphabetic('a'));
    // prints --> is_not_alphabetic('a') = false
    dbg!(is_not_alphabetic2('a'));
    // prints --> is_not_alphabetic2('a') = false

}
In the above code we can see already the new way of creating functions.
These are called “Closures” in Rust. In other languages these are called “Lambdas”.
A closure has the syntax:
#![allow(unused)]
fn main() {
|argument1:type1, argument2:type2| { code; code; code; return value; }
}
You can have a function that accepts no arguments:
#![allow(unused)]
fn main() {
|| { code; code; code; return value; }
}
And as usual, you can omit the return by skipping the semicolon:
#![allow(unused)]
fn main() {
|| { code; code; code; value }
}
Finally, if it’s only one statement, we can skip the curly brackets altogether.
#![allow(unused)]
fn main() {
|| value
}
For example:
#![allow(unused)]
fn main() {
|| 3.51
}
Or:
#![allow(unused)]
fn main() {
|| println!("Here's a text")
}
These are all functions. But you need to store them into a variable or pass them into a function in order to use them. This syntax, by itself, does nothing.
#![allow(unused)]
fn main() {
// This makes sense: (gives it a name)
let f1 = || println!("Here's a text");
// we call it as 'f1()'
f1();
// This does not make sense:
|| println!("Here's a text");
// doesn't have a name, can't be called.
}
Or a more advanced example could be:
#![allow(unused)]
fn main() {
let c = count(text, |c| matches!(c, 'a'|'e'|'i'|'o'|'u'));
}
We just created a function that returns true for vowels in less than one line.
This is quite powerful, and it’s okay to feel overwhelmed on this for now. I won’t be writing code like this, so you don’t need to truly understand all these for now.
But it’s important that we know that these exist.
Project: A simple game with Macroquad
Macroquad is a simple game engine aimed for beginners that only requires minimal knowledge of Rust:
https://crates.io/crates/macroquad
We will use this game engine only for this game, then we will shift to something more powerful. This means that in the process you’ll have to learn the API of this to never use it again, but in fairness, it is pretty simple.
The alternative would be to not do this project now and keep reading theory. But that’s not fun, and we should put the current knowledge into use, so it becomes the foundation for the next things that will come.
Survival pong
A pong game where the player just makes the ball bounce against the wall. It scores for each wall hit (even top-down walls).
Every time the ball hits the paddle, it speeds up a bit.
Logically, the tactic has to be to make each shot hitting as many walls as possible before returning to the paddle.
Level: Adept
Now we’re getting serious. Hope you did as many exercises as you could, because we’re reaching a level that is high enough to compare to most books.
From here, you should be able to follow other books too to reinforce this learning.
We will push in this stage basically from zero to 100. I’ll get you into a minimal base, so you will be able to do useful programs after this part.
Magic? Arcane? Not anymore. We’ll get understanding on most concepts in programming, so they will stop sounding like black magic.
Let’s use libraries and create programs that perfectly could run in a production environment.
NOTE: It’s possible that I’m pushing this section too far. I’m aware that I am covering too much ground here. Depending on how this plays out I might split this into two.
Modules - splitting files
Having all the program into a single file stops being convenient as the program gets bigger and bigger. One hundred lines are fine, 1000 maybe, but 5000 is definitely too big to handle.
The problem is as the file grows we easily lose track of things, in which parts they were and so on.
The whole folder that cargo new created for us is called a project. So if we
recall when we created the initial project:
$ cargo new learnrust
     Created binary (application) `learnrust` package
But so far we have been adding different binaries, and with that we have been creating different files.
src
├── bin
│   ├── enums2.rs
│   ├── enums.rs
│   ├── hashmap.rs
│   ├── print.rs
│   ├── sample1.rs
│   ├── structs.rs
│   ├── turtle_loops.rs
│   ├── turtle_vars.rs
│   └── variables.rs
└── main.rs
However, these are not modules! Those are binaries.
Modules can be reused between different files while binaries can only be compiled as full programs. We cannot get a function from a binary into a different one.
To share functionality we need to move it into modules.
For example, let’s say we need something to be reused. Maybe we want a file that contains units of measure.
So we’ll create a new file called src/units.rs.
And we add a few units of length. Or all of them now that we’re on this:
#![allow(unused)]
fn main() {
pub enum LengthUnit {
    Kilometer,
    Meter,
    Millimeter,
    Inch,
    Angstrom,
    Mile,
    Furlong,
    Chain,
    Rod,
    Fathom,
    Yard,
    Foot,
    Parsec,
    LightYear,
    AstronomicalUnit,
}

}
Yay! We got a new module. Or do we?
So in order to be a full module we should be importing this from another file.
For src/main.rs we can add the following line at the top:
mod units; // <-- this line!

fn main() {
    println!("Hello, world!");
}
This will declare the module. Now we can use units::LengthUnit:
mod units;

fn main() {
    println!("Hello, world!");

    let m = units::LengthUnit::LightYear;
    dbg!(m);
}
This is difficult to type down, so we can add a use line to bring LengthUnit
into scope:
#![allow(unused)]
fn main() {
use units::LengthUnit;
}
Then we can just do:
#![allow(unused)]
fn main() {
let m = LengthUnit::LightYear;
}
And that’s it! We’re sharing code across files.
We just did a simple enum, but it can be constants, structs, functions, whatever.
Adapting for binaries in src/bin
For the programs that we have inside the src/bin/ folder this does not work
as Rust is expecting the modules to also live in src/bin/.
Unless you want to have a messy code where all the files are on this folder, we need a way to tell Rust to read in the parent folder instead.
To fix this, we need to create a file named src/lib.rs (in the parent folder).
In this file we will have only the following lines:
#![allow(unused)]
fn main() {
pub mod units;
pub use units::LengthUnit;
}
This will enable us to use the modules in the whole package.
Let’s create a new binary for testing this. We will call this
src/bin/conversor.rs.
Remember to update Cargo.toml to add this binary.
As usual, we need a fn main() to start a new binary:
fn main() {
    // ...
}
Notice how conversor.rs does need a main, but units.rs does not.
Now we can bring to scope what we want. Feel free to choose the line you prefer:
#![allow(unused)]
fn main() {
use learnrust::units;
use learnrust::LengthUnit;
}
In my case, I think I’ll settle with use learnrust::LengthUnit; as it’s more
convenient.
use learnrust::LengthUnit;

fn main() {
    let furlong = LengthUnit::Furlong;
    dbg!(furlong);
}
Let’s try cargo run --bin conversor:
$ cargo run --bin conversor
    Finished dev [unoptimized + debuginfo] target(s) in 0.04s
     Running `target/debug/conversor`
[src/bin/conversor.rs:5] furlong = Furlong
Yay! This works!
What are those other data types for?
So we talked earlier about Rust data types, and we’re just using a few. Why do they exist? Let’s put them together here:
| Type | Min | Max |
|---|---|---|
| u8 | 0 | 255 |
| u16 | 0 | 65535 |
| u32 | 0 | 4294967296 |
| u64 | 0 | 1.84 * 10^19 |
| Type | Min | Max |
|---|---|---|
| i8 | -128 | 127 |
| i16 | -32768 | 32767 |
| i32 | -2147483648 | 2147483647 |
| i64 | -9.22 * 10^18 | 9.22 * 10^18 |
Examples:
- u8 is generally used to represent characters in the ASCII table, and also bytes in a file in disk.
- u16 is used for storing UTF16 characters, which are 2 byte long.
- u32 can be used to store colors of pixels of an image (Red, Green, Blue and Alpha)
While a single number might be small in comparison to the amount of memory a computer has, some programs are in fact “number crunching programs”, where millions or even billions of numbers need to be processed very fast. When you have so much data, compacting it on the smallest possible representation will save memory and/or disk space.
That is why, for what we’re doing in this guide we don’t care that much and use i64 for everything. All in all these are toy programs. Our toy programs don’t do much and the difference in memory used is roughly zero.
In real life, things are different. Say you want to read a JPG photo from your phone camera and do some process on it, like enhancing the photo. A photo can easily be 16 million pixels, and if for each pixel we use an i64 for each color (Red, Green and Blue), we would be wasting a lot of memory.
A program that plays chess by itself has to consider billions of chess possibilities, in this case it is also important to keep each representation as compact as possible.
On the other hand, there are also the two float types, f32 and f64. The difference between them is not the maximum or minimum number like integers, but the amount of significant digits they can carry. f32 can record 6 digits correctly (and a few extra ones) while f64 can record more than 12.
Floating point numbers are used specially on scientific problems. Depending on the problem at hand an f64 might be required, while in others f32 might be better as it has enough precision, but it is smaller, allowing for much complex simulations.
Graphics cards use a lot of floating point numbers to draw scenes for a game. If the precision is not high enough it might lead to jitter: https://www.youtube.com/watch?v=jsLiDQyyBXk
I hope this helps to understand why these types exist, and why we aren’t using them for now.
Const and Static
So far we saw let and let mut. If it’s not mut, it cannot be changed, right?
Well, we have other two ways of creating variables: const and static.
Both have something in common: They can be used to declare names that can be used across all your program, meaning, that they don’t need to be tied to a particular function or scope.
Programming languages typically had global variables, those that you can use across all functions. But Rust almost doesn’t have any global variable.
One of the biggest pain points for people that already know how to code in another language, and they come to Rust is the expectation to create global variables, and they find it near impossible to do.
Const
First, let’s explain what const does. It stands for “constant”, and this
means that the value they contain cannot be changed.
We can do something like:
const NUM_THREADS:u32 = 6;

fn main() {
    for n in 0..NUM_THREADS {
        println!("Creating thread {}...", n + 1);
    }
}
Upon compiling, Rust will basically replace all instances where you used a constant with the actual value:
// const NUM_THREADS:u32 = 6;

fn main() {
    for n in 0..6 {
        println!("Creating thread {}...", n + 1);
    }
}
Also, const must have a type. You can’t do:
#![allow(unused)]
fn main() {
const NUM_THREADS = 6;
}
We must do:
#![allow(unused)]
fn main() {
const NUM_THREADS:u32 = 6;
}
If you have a complex struct, it will recreate the struct in every place.
For these uses, static will be better suited.
#![allow(unused)]
fn main() {
const ADMIN: User = User {
    id: 1,
    active: true,
    posts: 0,
    // ... 50 more fields ...
}
}
But constants must be values that can be obtained at compile time. Values that require running code at runtime will not work as constants:
#![allow(unused)]
fn main() {
fn calc_pi() -> f64 {
    // ...
    return pi;
}

const PI: f64 = calc_pi(); // <- this doesn't work!
}
Some values surprisingly need to be computed at runtime. For example, vectors.
#![allow(unused)]
fn main() {
const LUCKY_NUMBERS: Vec<i64> = vec![1,6,32];
}
That’s because it really equates to:
#![allow(unused)]
fn main() {
const LUCKY_NUMBERS: Vec<i64> = {
    let mut v: Vec<i64> = Vec::new();
    v.push(1);
    v.push(6);
    v.push(32);
};
}
You can do arrays:
#![allow(unused)]
fn main() {
const LUCKY_NUMBERS: [i64; 3] = [1,6,32];
}
But again, this will create the array each time you use the name.
It might be a bit puzzling, but you can create a constant text if it’s a &str, but not if it is a String.
Or maybe it’s easy to understand that this is a constant value:
#![allow(unused)]
fn main() {
"Hello world"
}
But this is not:
#![allow(unused)]
fn main() {
"Hello world".to_owned()
}
It needs a function call, therefore it can’t be executed in compile time.
Const functions
For the sake of understanding I want to just mention that there exists something called constant functions.
Instead of:
#![allow(unused)]
fn main() {
fn function_name() {
}
They have the const keyword:
#![allow(unused)]
fn main() {
const fn function_name() {
}
These functions can be executed at compile time, and will produce const values.
The Rust standard library has a few of those and can be used to create new constant values.
However, they are very limited. Almost every function can’t be const because they do things that Rust can’t execute at compile time.
I won’t teach in this book how to create these functions, but we can use already existing ones to create constant values.
Static
While const could be created inside a function or globally in the file,
static can also be created inside a function or globally.
Static variables are full-blown variables like let. They live in your computer
RAM, and they have a memory address.
However, the values they can be initialized to are mostly the same as for const.
The value must be able to be obtained at compile time, for example, as a result of a const function.
Global variables can be modified at runtime in other languages. But not in Rust.
Confusingly, Rust does allow you to have a static mut, but it doesn’t allow
you to change it.
statuc mut PAGE_HITS: i32 = 0;

fn main() {
    PAGE_HITS += 1; // error!
}
This is because changing a static variable is unsafe. It can be done by using an unsafe block:
statuc mut PAGE_HITS: i32 = 0;

fn main() {
    unsafe {
        PAGE_HITS += 1;
    }
}
While this does work, this is very bad practice. If you use unsafe, you must
know what you’re doing. And turns out that even experienced programmers don’t
really know what problems might arise from doing these things.
So the best thing to do is to avoid unsafe altogether and don’t write into
static.
Global variables are a symptom of a bad design. If you find yourself trying to do a mutable static, think how to change your program to convert it into regular local variables.
There are other, safe ways, of having mutable statics. We will look onto them later on.
Not everything are numbers and texts: Structs
So far we have seen the basic building blocks for almost everything. Functions, conditions (if), loops (for) and some data types. This will get us already very far.
But! For today’s standards, we need a bit more knowledge. One of the pieces that we have missing and is still critical are structs.
Do not worry. They’re very easy to understand and natural. Structs are basically composite types. This is, a data type that contains different kinds of data.
For what would we need such a strange thing? Those programmers… are crazy. We love making up complicated stuff. Hah! Got you! You were thinking this, right?
Anyway, trust me they’re super useful. Let’s assume we want to track points in 2D space. A point in 2D has two coordinates: \(x, y\)
For this, we could write something like:
#![allow(unused)]
fn main() {
let x = 0.0;
let y = 0.0;
}
And we’re done. No need for structs.
Okay, but we want 5 points. Now what?
#![allow(unused)]
fn main() {
let point1_x = 0.0;
let point1_y = 0.0;

let point2_x = 0.0;
let point2_y = 0.0;

let point3_x = 0.0;
let point3_y = 0.0;

let point4_x = 0.0;
let point4_y = 0.0;

let point5_x = 0.0;
let point5_y = 0.0;
}
Done! Super easy.
But now let’s say we want a function that accepts a point and moves it a certain amount:
#![allow(unused)]
fn main() {
fn move_point(mut px: f64, mut py:f64, dx:f64, dy:f64) -> (f64, f64) {
    px += dx;
    py += dy;
    return (px, py);
}
}
Note that this function returns two values. We haven’t seen this yet.
And now we want to move a point a few units:
#![allow(unused)]
fn main() {
let (point1_x, point1_y) = move_point(5.0, 0.0, point1_x, point1_y);
}
Still feels good this kind of coding? Doesn’t it feel clunky?
Wait! There was a mistake in the above code. We passed 5.0 as the distance
where we should have passed the point. The arguments are in the wrong order!
This, my friend, wouldn’t have occurred with clever uses of structs.
Same idea, but with structs:
struct Point2D { x: f64, y: f64, } struct Vector2D { dx: f64, dy: f64, } fn move_point(mut point: Point2D, distance: Vector2D) -> Point2D { point.x += distance.dx; point.y += distance.dy; return point; } fn main() { let mut p1 = Point2D{x: 0.0,y: 0.0}; let p2 = Point2D{x: 3.0,y: 0.0}; let dist = Vector2D{dx: 5.0, dy: 0.0} p1 = move_point(p1, dist); }
Now we’re talking. Wait, too much? Ok, let’s break it down.
First, we define a new data type called Point2D, which is a struct:
#![allow(unused)] fn main() { struct Point2D { x: f64, y: f64, } }
It contains two members: x and y. Both are f64 (number with decimals).
With this, we can already create our values of type Point2D.
So, if we did before:
#![allow(unused)] fn main() { let p: f64; }
We can now do:
#![allow(unused)] fn main() { let p: Point2D; }
Because that’s now a user type, and it acts similar to all other types.
To construct it, we simply specify the values of the contents:
#![allow(unused)] fn main() { let p2 = Point2D{x: 3.0,y: 0.0}; }
That creates a point p2 that sits at 3,0.
To access the contents, just use the dot operator:
#![allow(unused)] fn main() { println!("x: {}, y: {}", p2.x, p2.y); }
To change the value, you can use the same trick with the dot:
#![allow(unused)] fn main() { let mut p1 = Point2D{x: 0.0,y: 0.0}; p1.x = 10.0; println!("x: {}, y: {}", p1.x, p1.y); }
Or, if you want, you can also replace the point as a whole instead:
#![allow(unused)] fn main() { let mut p1 = Point2D{x: 0.0,y: 0.0}; println!("x: {}, y: {}", p1.x, p1.y); p1 = Point2D{x: 20.0,y: 0.0}; println!("x: {}, y: {}", p1.x, p1.y); }
I also did the same for something called vector:
#![allow(unused)] fn main() { struct Vector2D { dx: f64, dy: f64, } }
A vector can be used to specify distances or relative positions. While point is absolute. Other than that, it’s the same thing. Works exactly the same.
So why? If they’re effectively the same thing; both have \(x, y\) and use the same type, why bother on creating another one? Couldn’t we use the same Point2D for everything?
Of course! That would work. But it would work… too much.
The issue is that they aren’t technically the same thing. A point is like a position in GPS (30ºN, 20ºW), while a vector is a distance + length (200 km north-east).
If we confuse those two, we can end with:
- A position that basically is on the North Pole. (At the zero position)
- A vector that says: travel 300,000 km south.
Both of which are very wrong.
Remember what happened on the function before where we confused both parts? Well, not gonna happen now:
#![allow(unused)] fn main() { fn move_point(point: Point2D, distance: Vector2D) -> Point2D { point.x += distance.dx; point.y += distance.dy; return point; } }
This function accepts first a point, then a vector. If you accidentally reverse them, Rust is not going to accept the program and error out.
So we have now two types that are almost the same thing but can’t be intermixed.
This is very useful. The amount of errors that get caught this way is tremendous.
Using only one type (point) for everything would at least protect us from mixing accidentally \(x\) and \(y\) coordinates.
But using two types, ensures that the code stays error-free (mostly).
Structs not only are useful to enforce type-safety. They also are needed to get more complex types working.
For example, in an invoicing application you might want to store items.
So we could do:
#![allow(unused)] fn main() { struct Item { name: String, price: f64, provider: String, observations: String, obsolete: bool, stock: f64, min_stock: f64, max_stock: f64, } }
And I think this looks very convenient to use, instead of simple variables.
Struct-specific functions, really?
Really. Remember this function?
#![allow(unused)] fn main() { fn move_point(mut point: Point2D, distance: Vector2D) -> Point2D { point.x += distance.dx; point.y += distance.dy; return point; } }
Turns out that it acts on points, and it only makes sense on points. So we can make this function be part of the struct itself.
The idea is that, instead of writing:
#![allow(unused)] fn main() { p1 = move_point(p1, d1); }
We could write:
#![allow(unused)] fn main() { p1 = p1.move_point(d1); }
Which looks way nicer. And because “point” is implied, we can rename it:
#![allow(unused)] fn main() { p1 = p1.move(d1); }
And it’s way more natural now.
So, how we make this happen?
Implementing the struct. There’s the keyword impl and we just do:
#![allow(unused)] fn main() { impl Point2D { // Stuff here.. } }
And inside, we put the function:
#![allow(unused)] fn main() { impl Point2D { fn move_point(mut point: Point2D, distance: Vector2D) -> Point2D { point.x += distance.dx; point.y += distance.dy; return point; } } }
The first parameter, we call it Self to make the p.move_point magic happen:
#![allow(unused)] fn main() { impl Point2D { fn move_point(point: Self, distance: Vector2D) -> Point2D { point.x += distance.dx; point.y += distance.dy; return point; } } }
Now rename the function to move, because “point” is implied, and voilà:
#![allow(unused)] fn main() { impl Point2D { fn move(point: Self, distance: Vector2D) -> Point2D { point.x += distance.dx; point.y += distance.dy; return point; } } }
This is all we need to get the fancy stuff in. And the cool part is that these functions don’t pollute our other code. They’re encapsulated in the type.
If you want to move a point, or do something to a point, you look into the functions that are implemented for the point. Which makes sense, right?
Basically we look, and ask: what do points do? And the list of functions tells us the capabilities of this new type.
Also, if we want we can also call this function explicitly:
#![allow(unused)] fn main() { p = p.move(d1); p = Point2D::move(p, d1); // Exactly the same as the previous line. }
Why would we want to do this? Well, right now we don’t. It’s longer, uglier, and harder to read. When possible, we will use the shorter form.
But this is the key: when possible. Sometimes is not possible, or very inconvenient. That’s when this form will come in handy.
A bit of keywords
When a struct has a variable inside, it is called a member.
#![allow(unused)] fn main() { struct Point { x: f64, // <-- this is a member of Point } }
When a function exists inside the implementation of a struct, it is called a method:
#![allow(unused)] fn main() { impl Point { fn move(mut p: Self, d: f64) { // <-- this is a method of Point p.x += d; return p; } } }
Now you know. Be sure to use these terms as much as possible to avoid those weird looks from senior devs that seem that want to kill someone. “Have you heard? They just called a method a ‘function’… A function! How silly is that?”
Also be sure to ask for a pay rise because of this too.1
For those that haven’t caught on the joke, almost all developers are very snob towards naming things. And they act like these have nothing to do, completely different. Furthermore, we keep crafting new names for the same thing, up to the point where the same concept has like 20 names. But it feels so special! I wonder what would happen when they ran out of English words to use2.
Wait, I do know. See TMTLA.
OOP? More like OP.
Have you heard of OOP? In the 90s, Object-Oriented Programming was quite a thing. Everyone wanted OOP, more OOP. OOP everywhere.
Well, guess where are we now… everything is OOP.

To the point that a “Hello World” program in Java requires prior OOP knowledge to understand it. It is a bit sad and funny at the same time.
Thankfully Rust hasn’t followed this trend, and we managed to stay out of OOP (for the most part) until now.
But we just saw Structs and methods. And Sir/Madam, this is already OOP.
Java people will tell you (and me) that Rust doesn’t have OOP, and definitely, what I described here is not OOP by a long, long shot. Never, ever!
Whatever. It is Object-Oriented Programming.
The basics of OOP is that you have something called “Objects” (structs or class), and you can spawn many of them. An object has members (variables) and methods (functions) associated with them.
That, you already learned.
There’s lots more to OOP, like inheritance (which Rust doesn’t have), access permissions, interfaces, etc. Depends on who defines it, they will say OOP must have more or less things.
But if you ask me, OOP are structs, members, and methods. That’s it. Everything else is language-dependent.1
You’ll learn later on about Rust Traits, that are similar to Java interfaces. Also, quite a huge thing in OOP.
Bottom line is that you know already the basics, don’t let the OOP herd tell you otherwise.
And they will say I have no idea about OOP, coding or whatever. And I’m fine with that.
Need to write back: &mut and *
We saw functions, and to get the data back we were returning values:
#![allow(unused)] fn main() { fn test() -> f64 { }
Sometimes, we want more than one value to be returned. We can use tuples:
#![allow(unused)] fn main() { fn test() -> (f64, f64, f64) { }
This way multiple values can be returned, as we saw before.
But every time we’re creating the values. Sometimes, we want to write on the original variable.
As you’re starting to learn how to code, I would recommend creating new variables each time, and maybe use shadowing.
But if this is definitely a bad idea for your use case, we can instead write into a variable that was passed.
Consider the following code:
fn add_one(mut n: i64) { n += 1; } fn main() { let x = 5; add_one(x); println!("{}", x); }
This does not add one to x. In fact, x value will be copied into n
inside the function, then it will add one there, and n will be discarded.
x is still 5 and untouched.
It doesn’t matter if x is marked as mut or not. Is the value that is copied,
and it is the copy that gets modified, not the original.
Functions provide isolation. They cannot touch the outer variables easily. This is a feature, not a bug.
But what if we want to modify x inside the function? Is it possible?
Yes, but the trick resides in, instead of copying the value, copy the address where the value resides.
Let’s see how this looks:
fn add_one(n: &mut i64) { *n += 1; } fn main() { let mut x = 5; add_one(&mut x); println!("{}", x); }
Here, the clue is in the &mut that appears both in add_one declaration, and
in the call to that function.
The & operator in Rust borrows the variable. Usually for read-only, but as this
is a &mut, it will borrow it for write.
In C++, the
&operator retrieves the memory address. It is very similar, if not identical to what Rust does. But Rust semantics are borrowing, while in C++ means literally to get the address.
This changes the type, from i64 to &mut i64. This is important, as they are
very different types, even if they look similar. i64 is a number, where
&mut i64 is a mutable borrow of a number.
The variable n no longer contains a number, but contains which variable we
borrowed.
#![allow(unused)] fn main() { x = 5; n = &mut x; // n contains a pointer to x: ->x }
This is a bit confusing, and for now we will cover only the minimum amount to get a basic understanding.
For example, this is wrong:
#![allow(unused)] fn main() { fn add_one(n: &mut i64) { n += 1; } }
Wrong, because n += 1 is not possible here. The variable n is not a number.
It points to another variable. Trying to add \(1\) means that we want to
change the variable that is pointing at. And that doesn’t make any sense.
To make this work, we need to convert n from the type &mut i64 back into
i64.
To do this, we use the * (asterisk) operator. Also known as dereference
operator. This undoes the & operator.
#![allow(unused)] fn main() { *n += 1; }
At this stage I would say it is too early to start using this, but it’s good that you know that this exists and more or less how it’s done.
In Rust, the main reason to do this instead of returning the value is when we have complex objects like Structs, and it can be quite a deal to return a full copy. Other times it is just for performance reasons, as for long strings or buffers it might be better by using a supplied buffer to write instead of creating it each time.
Finally, in some specialized codebases, like programs that must run at real time, we need to ensure that everything runs without waits. And allocating or freeing memory has the potential to induce a wait on the operating system.
As said. This is quite special. I don’t recommend this.
Enums!
We just saw structs, where we could have a type that contains many things at a single time. Structs are one of the basic blocks of programming. Enums are probably their other half.
Consider the following, what if instead of storing many things at a time, we wanted to store one of several options?
For example, a type that could be either an integer or a string. But not both.
The usefulness of this, as usual, is hard to see initially. But examples will follow soon!
A form with options
Something that is easy to relate are real-world forms. Imagine you were trying to get the bank to lend money to you, and they lend you a form.
In the form, the following appears:
What is your current status?
- (_) Are you working?
- Name of the company [_______]
- Field / Type of company [______]
- Type of contract? () Permanent full time () Permanent part-time (_) Contractor
- (_) Are you studying?
- Field of study [______]
- Years in school [__]
- (_) Other, not studying or working.
- Please specify [________]
Or this:
Marital Status:
- (_) Single
- (_) Married
- (_) Other
These “single choice” options can be represented as Enums.
For example:
#![allow(unused)] fn main() { enum MaritalStatus { Single, Married, Other, } }
Then in code, we can choose one of the three options:
#![allow(unused)] fn main() { let status1 = MaritalStatus::Single; let status2 = MaritalStatus::Married; let status3 = MaritalStatus::Other; }
Of course, you can put as many options as you want!
But, for “Other” we don’t really know what happened here, so we want to have the user to specify what they meant by “Other”:
Marital Status:
- (_) Single
- (_) Married
- (X) Other [_________________]
In Rust, we do:
#![allow(unused)] fn main() { enum MaritalStatus { Single, Married, Other(String), } }
Now, if we specify “Other” we need to put text with it:
#![allow(unused)] fn main() { let status3 = MaritalStatus::Other("divorced".to_string()); }
You can also have names and multiple values inside too:
#![allow(unused)] fn main() { enum MaritalStatus { Single, Married, Other{ status: String, observations: String}, } }
#![allow(unused)] fn main() { let status3 = MaritalStatus::Other { status: "divorced".to_string(), observations: "in 2004".to_string(), }; }
More complex enums are possible, as you can compose them with structs:
#![allow(unused)] fn main() { enum ContractType { PermFullTime, PermPartTime, Contractor, } struct Work { company_name: String, field: String, contract_type: ContractType, } struct Study { field: String, years: i64, } enum CurrentStatus { Work, Study, Other { specify: String }, } }
This reflects the earlier form:
What is your current status?
- (_) Are you working?
- Name of the company [_______]
- Field / Type of company [______]
- Type of contract? () Permanent full time () Permanent part-time (_) Contractor
- (_) Are you studying?
- Field of study [______]
- Years in school [__]
- (_) Other, not studying or working.
- Please specify [________]
Enums in other languages
In C++, Java and most other languages, enums are much simpler and can’t do most of what Rust can.
In fact, they’re just a fancy way of creating constant values associated to numbers.
Imagine we’re writing a library to open files, and we have a file mode:
#![allow(unused)] fn main() { enum FileMode { Read, // -> 0 Write, // -> 1 ReadWrite, // -> 2 Create, // -> 3 Append, // -> 4 } }
These are very similar to creating constants associated to numbers:
#![allow(unused)] fn main() { const READ: u16 = 0; const WRITE: u16 = 1; const READWRITE: u16 = 2; const CREATE: u16 = 3; const APPEND: u16 = 4; }
Having an enum makes the creation simpler, and groups everything together nicely.
It starts counting at zero, but we can assign a particular number if we want. It will continue counting from there:
#![allow(unused)] fn main() { enum FileMode { Read = 12, // -> 12 Write, // -> 13 ReadWrite, // -> 14 Create, // -> 15 Append, // -> 16 } }
If we have two numbers or more assigned, it works too:
#![allow(unused)] fn main() { enum FileMode { Read = 12, // -> 12 Write, // -> 13 ReadWrite, // -> 14 Create = 20,// -> 20 Append, // -> 21 } }
In Rust, you can extract the actual number by casting to integer:
#![allow(unused)] fn main() { dbg!(FileMode::ReadWrite as u16); }
Another example:
#![allow(unused)] fn main() { enum Numbers { One = 1, // -> 1 Two, // 2 Three, // 3 Four, // 4 FourtyTwo = 42, // -> 42 FourtyThree, // 43 } }
Other examples
Imagine a datatype called When that could take any of the following:
- “Tomorrow”: As in, the meeting will be tomorrow.
- 12 (hours): Even will happen in 12 hours.
In a struct, the problem is that we must have two fields and one must remain empty:
#![allow(unused)] fn main() { struct When { name String, hours i64, } }
However, Rust doesn’t allow them to be empty. So we might be compelled to use zero as empty or the empty name as not set. But this isn’t a good practice. Using special values with special meanings is a bad idea in programming. We had a long history with special values, and it usually ends in bugs.
Here’s where an Enum helps:
#![allow(unused)] fn main() { enum When { name(String), hours(i64), } }
This can only take one of the values. Either is name or is hours.
We use them like this:
#![allow(unused)] fn main() { let tomorrow = When::name("tomorrow".to_string()); let hours_3 = When::hours(3); }
C++ has something similar to this, called union. But it’s not safe to use. Rust does have union as well and trust me, you don’t want to use unions unless you really, really… really know what you’re doing.
They also are useful to define names, for example a list of operation modes:
#![allow(unused)] fn main() { enum OperationMode { Read, ReadWrite, Append, Create, SelfDestruct, } }
Don’t confuse Rust enums with C++/Java enums. In these languages enums are useful only to associate a number to a name. Rust enums are way more powerful.
You might say: “Well, nice, but I don’t see myself using this ever. How is this a critical thing to know for a beginner?”
And the answer is that Rust itself is plagued with two very popular enums. You can’t avoid it. You’ll have enums in your code, want it or not.
These enums are Option<T> and Result<T>. I’ll discuss them now.
Option
Option is basically:
#![allow(unused)] fn main() { enum Option { Some(value), None, } }
And it is used when a value can be empty. But truly empty. Missing. Nil. Gone.
Because, you see, this is the empty string:
#![allow(unused)] fn main() { let text = "".to_string(); }
But it’s not missing. It’s an empty string. The value is not empty; it contains an empty string. Weird, hah!
You want an empty value?
#![allow(unused)] fn main() { let text: Option<String> = None; }
This one is empty.
And we can use this to have optional parameters in a function or a struct:
#![allow(unused)] fn main() { struct User { username String, real_name Option<String>, } }
Result
The other enum Result, is similar to this:
#![allow(unused)] fn main() { enum Result { Ok(value), Err(error), } }
This is used to have fallible operations. If something fails, it will return an
Err(error). The error inside contains details on what failed. If it works,
returns Ok(value) where value contains the data we needed.
For example, consider a function to divide:
#![allow(unused)] fn main() { fn divide(a: f64, b: f64) -> f64 { return a / b; } }
However, divide by zero is an error. To be able to communicate this error we can do:
#![allow(unused)] fn main() { fn divide(a: f64, b: f64) -> Result<f64> { if b == 0 { return Err(DivideByZeroError); } return Ok(a / b); } }
Unwrap
As commented, Rust libraries are full of Option and Result. So it’s very
easy to find something that returns these things.
For example, if we want to parse a string into a number:
#![allow(unused)] fn main() { let num: i64 = "1235".parse(); }
This doesn’t work because parse() will return a Result and not an i64:
#![allow(unused)] fn main() { let num: Result<i64> = "1235".parse(); }
But this is inconvenient. If we know that the result is going to be Ok, we can use unwrap:
#![allow(unused)] fn main() { let result_num: Result<i64> = "1235".parse(); let num: i64 = result_num.unwrap(); }
Or, in one line:
#![allow(unused)] fn main() { let num: i64 = "1235".parse().unwrap(); }
The problem with unwrap() is that will make the program crash if the result
is an error. So be careful when using this in places that are not guaranteed to
do as expected.
If you are okay with making the program crash at that point, consider using
expect() instead, which does the same but allows you to provide a message:
#![allow(unused)] fn main() { let num: i64 = "1235".parse().expect("failed to parse credit card number"); }
However, if making the program crash is not a good idea, you have to handle the error:
#![allow(unused)] fn main() { let result_num: Result<i64> = "1235".parse(); match result_num { Ok(num) => { // .. handle here the parsed number .. }, Err(e) => { // .. handle the error .. } } }
Rust forces you to choose what to do with the errors. There’s no “default action”
but instead, compiler errors and warnings until you decide to unwrap or handle
it. If you don’t decide, you’ll get complaints.
Oh, and this works with option too!
#![allow(unused)] fn main() { // TODO: divide was returning a result - find another example! let result_num: Option<f64> = divide(3.0, 1.2); match result_num { Some(num) => { // .. handle here the parsed number .. }, None => { // .. } } }
Understanding Rust Enums internals
WARN: Technical info ahead! This describes how things work in memory internally. This section is not required to understand, and feel free to skip. But for some readers, this might give some insight and understanding on Enums. Don’t obsess into understanding everything; just a general overview here is fine.
In C++ (and Rust) we have something called “unions”. A union is a type where all contents will be stored in the same place in memory.
#![allow(unused)] fn main() { union MyData { integer: i64, float: f32, text: [char; 20], } }
These contents will be put one on top of the other, overlapping the same region in memory.
If we did a struct like that:
#![allow(unused)] fn main() { struct MyData { integer: i64, float: f32, text: [char; 20], } }
In the memory we will have:
integer float text
[________][____][____________________]
All variables will be packed one after another.
However, if we were only going to use one of those at a time, we would be wasting a lot of memory of the computer.
Unions instead put everything in the same place:
[________] integer
[____] float
[____________________] text
Or, more accurately:
float integer text
[____]___]___________]
There are bytes in memory that will be shared across the float, the integer, and the text. Because of this, they use only the memory needed to hold the largest variable that they can contain.
This makes unions very dangerous as if you write text and then read float you’ll get back basically garbage.
That’s why, in Rust, reading unions is unsafe.
But if we knew what field we wrote, then we could actually read it without risk of getting back garbage.
Imagine we had constants to specify which field it is:
#![allow(unused)] fn main() { const FIELD_FLOAT: u8 = 0; const FIELD_INTEGER: u8 = 1; const FIELD_TEXT: u8 = 2; }
And then we store this along with the union, inside a struct:
#![allow(unused)] fn main() { union MyData { integer: i64, float: f32, text: [char; 20], } struct MyDataSafe { field_written: u8, data: MyData, } }
Now, as long as we always keep the field_written up to date, we know which one
was used, so we can read confidently data without risk of getting back
corrupted values.
We could write an implementation like this to ensure this is the case:
#![allow(unused)] fn main() { impl MyDataSafe { pub fn write_integer(&mut self, i: i64) { self.field_written = FIELD_INTEGER; self.data.integer = i; } pub fn write_float(&mut self, f: f32) { self.field_written = FIELD_FLOAT; self.data.float = f; } pub fn write_text(&mut self, t: [char; 20]) { self.field_written = FIELD_TEXT; self.data.text = t; } } }
And we could read “safely”:
#![allow(unused)] fn main() { impl MyDataSafe { pub fn read_integer(&self) -> i64 { if self.field_written != FIELD_INTEGER { panic!("wrong field type"); } unsafe {self.data.integer} } pub fn write_float(&self) -> f32 { if self.field_written != FIELD_FLOAT { panic!("wrong field type"); } unsafe {self.data.float} } pub fn write_text(&self) -> [char; 20] { if self.field_written != FIELD_TEXT { panic!("wrong field type"); } unsafe {self.data.text} } } }
Notice two things here. First, when we created the struct:
#![allow(unused)] fn main() { struct MyDataSafe { field_written: u8, data: MyData, } }
The layout in memory is:
float integer text
[_][____]___]___________]
^
--- field_written
Second, those constants:
#![allow(unused)] fn main() { const FIELD_FLOAT: u8 = 0; const FIELD_INTEGER: u8 = 1; const FIELD_TEXT: u8 = 2; }
Are actually a regular C++ enum:
#![allow(unused)] fn main() { enum Field { Float, Integer, Text, } }
And the struct:
#![allow(unused)] fn main() { struct MyDataSafe { field_written: u8, data: MyData, } }
Is actually an equivalent of a Rust Enum!
#![allow(unused)] fn main() { enum Field { Float(f32), Integer(i64), Text([char; 20]), } }
That’s what it actually is! Rust enums are kind of “safe C++ style unions”.
They use only the memory needed for the biggest value possible of all options, and they’re safe. Plus an extra byte or two to hold which variant are we talking about.
In some cases, Rust is “too smart” and it’s able to omit the extra byte needed to store the variant by using some tricks when compiling. But that is outside what I want to cover here.
Match!
Have you ever seen code like this?
#![allow(unused)] fn main() { let choice = 1; if choice == 1 { guess_game(); } else if choice == 2 { convert_units(); } else if choice == 3 { test_unwrap(); } else if choice == 4 { quit(); } }
Have you wondered if that could be written in a clearer way?
Then you’re in luck! Presenting the match:
#![allow(unused)] fn main() { let choice = 1; match choice { 1 => guess_game(), 2 => convert_units(), 3 => test_unwrap(), 4 => quit(), _ => {}, } }
As you can see, match has a beautiful syntax. Concise, yet powerful, that goes
to the point.
What match does is exploring different options that a value can take. So, if
we do:
#![allow(unused)] fn main() { let choice: i64 = 1; match choice { // ... } }
It is going to consider what values choice can take. Since it is an i64, it
can take billions of different numbers, either positive or negative, and for
each one we can specify what to do in each case.
But it does have a catch, as match requires us to consider all
possibilities. That is, we need to cover all possible numbers and specify an
action for it.
To avoid specifying all options one by one, we can have a default by using the
underscore _ => ...:
#![allow(unused)] fn main() { let choice: i64 = 1; match choice { 1 => do_something(), _ => panic!("Invalid option!"), } }
It can understand ranges too:
#![allow(unused)] fn main() { let choice: i64 = 1; match choice { 1 => do_something(), 2..=10 => panic!("This option is not supported yet"), _ => panic!("Invalid option!"), } }
And it can understand enums too!
#![allow(unused)] fn main() { enum Choice { GuessGame, ConvertUnits, TestUnwrap, Quit, InvalidChoice, } let choice = Choice::GuessGame; match choice { Choice::GuessGame => guess_game(), Choice::ConvertUnits => convert_units(), Choice::TestUnwrap => test_unwrap(), Choice::Quit => quit(), Choice::InvalidChoice => {}, } }
And this is useful to handle errors:
#![allow(unused)] fn main() { let input_number = "12345"; // provided by user let res_number:Result<i64> = input_number.parse(); match res_number { Ok(number) => println!("your number is {}", number), Err(e) => println!("There was an error parsing your number: {:?}", e), } }
A bit more advanced usage could be:
#![allow(unused)] fn main() { let input_number = "12345"; // provided by user let number:i64 = match input_number.parse() { Ok(number) => number, Err(e) => { println!("There was an error parsing your number: {:?}", e); return; } }; println!("your number is {}", number); }
Floating point gotchas
Let’s begin saying that, in math:
\[ 1.1 + 1.1 + 1.1 = 3.3 \]
That is obvious.
But in computers:
#![allow(unused)] fn main() { let a = 1.1; let b = 3.3; let c = a + a + a; println!("b = {}", b); println!("c = {}", c); println!("b == c? -> {}", b == c); println!("b - c = {}", b - c); }
b is not equal to c. The difference is -0.0000000000000004440892098500626.
Of course, this is wrong. The difference should have been zero. But this is not how computers work.
Surprised? We thought computers were stupid glorified calculators, but they can’t even get a simple sum right.
This is because how decimals work in a computer when using floating points. They use base 2 (ones and zeros) to represent the numbers, and when we have a number that has a decimal point, this becomes a problem.
If you’re not interested on the explanation, just remember that you cannot expect any two floats to be equal. You have to check if they are “close enough”. Also, before converting them to integer, you first have to round them. You might think you have 295.0 but in reality it might be 294.999999999996, and if you just cut the decimals instead of rounding you get 294 instead of 295. It feels stupid, because it is.
We need to understand that not all numbers can be written down.
Yes, let that sink in. There are numbers you can’t write.
For example \(\pi\), we can write 3.1415 but doesn’t matter for how long we
try, it will never be the real \(\pi\). Because it’s irrational.
But on the real numbers it also happens. Even in the rational ones (fractional).
A common example is \(10 / 3\):
\[\frac{10}{3}=3.333333333…\]
It doesn’t matter how long you keep writing, you cannot write it down.
Why?
Well, our system is decimal, base 10. And \(10 = 2 × 5\).
This means we can only represent fractions that divide by multiples of 2 and 5.
So, for example the following fractions are representable:
\[\frac{1}{25}\]
\[\frac{6}{2560}\]
But \(1/3\) is not, because 3 is a prime, and our decimal system doesn’t include 3 as a factor.
Now, for a computer that is using a binary system the only factor is 2.
This means that when a number is the result of dividing by 5, we can probably represent, but the computer cannot.
The number 1.1 is in reality:
\[\frac{11}{2 × 5}\]
The computer can represent \(11/2=5.5\) but not \(11/10=1.1\).
That will lead to infinite decimals, but a f64 will cut at some point. And
there you have your imprecision. While your written number comes with full
precision, the one written by the computer can’t get that level of precision
regardless of having 20 or 500 decimal places.
Do you think it’s lame?
Try writing down:
\[\frac{100}{29}\] \[\frac{100}{53}\] \[\frac{100}{97}\]
Were you able to do it? No?
Lame!
Well, that’s how your computer feels. Please be respectful. They only have base 2 to work with.
Is this a Rust problem?
No, it is a hardware problem. All languages suffer from this. Some of them are better than others at hiding this fact.
There exist “Decimal” implementations in some languages including Rust that use base 10 and get rid of this problem entirely.
But those are much slower, but used in financial applications to prevent errors.
Why this wasn’t addressed?
When they created floating points, computers were very slow and memory was very limited. Adding support for base 10 decimal numbers would have been near impossible and most of the programs of the era wouldn’t have enough resources to run.
Also, floats were invented for scientific purposes, like sending people to the moon. In this case, high precision was better than having base 10. Because even if they can’t fully represent some numbers, overall they give better precision to numbers that arise from physics calculations.
So they went with that, and we’re stuck with them forever. Nowadays, the majority of the applications would benefit from base 10, and there is more than enough resources to run them in this manner. Yet we keep doing this in software.
I guess that everyone got used to this, and no one cares anymore.
Conclusion
Comparing if two floats are equal: bad.
Comparing if two floats are not equal: very bad.
Converting to integer without rounding: super-mega bad.
What to do instead?
Comparing if two floats are equal:
Instead, check if the difference between them is very small:
#![allow(unused)] fn main() { let a = 1.1; let b = 1.1; if (a-b).abs() < 0.00000001 { // equal } }
Comparing if two floats are not equal:
Instead, check if the difference between them is bigger than a very small number:
#![allow(unused)] fn main() { let a = 1.1; let b = 1.1; if (a-b).abs() > 0.00000001 { // not equal } }
Converting to integer without rounding:
Please round first:
#![allow(unused)] fn main() { let a:f32 = 294.999999999; let b:i64 = a.round() as i64; }
Other problems
Not A Number?
See 0/0.
Infinity?
See 1/0 and -1/0.
Positive and negative zeros?
See \(1 × 0\) and \(-1 × 0\)
Not sortable
In Rust, if you have data in a table that are floats, and you want to sort this data, you can’t.
Because of NaN, floats cannot be sorted. But they can be partially sorted.
Not infinitely big
Loss of precision at very big numbers
Project: A simple game with ggez
Now that we know a bit about structs, enums and similar stuff, we’re ready for our next game.
As expected, we will change the game engine to something more appropriate: ggez
In comparison with Macroquad that we have seen before, this one uses structs. Because of this we can organize our code much better and make a game that can grow in features without getting too convoluted.
Space-recycler
A horizontal shooter game (ship) where the goal is to avoid asteroids while collecting as much trash as possible.
For extra difficulty, we’ll have different recycling bins and the player has to put each item in the right bin. Because this is a game about recycling!
This is a complex project, and it will take quite a bit of time to complete. It took me around 20 hours to figure out everything, so I guess for someone that is still learning it could take 1-2 weeks.
But no worries, I will be assisting, so hopefully that cuts back as much time as possible.
Creating the new project
As this is a complete game, we will have it in its own crate (or folder). We’ll begin by creating it:
$ cargo new spacerecycler
We can add already the dependencies we will need in Cargo.toml:
[package]
name = "spacerecycler"
version = "0.1.0"
edition = "2021"
[dependencies]
ggez = "0.7.0"
rand = "0.8"
[profile.dev.package."*"]
opt-level = 2
That would add ggez at version 0.7 and rand at 0.8.
The part for [profile.dev.package."*"] is important. That tells Rust how
to compile the dependencies when in debug mode. opt-level = 2 enables the
optimizer at the same level as for release.
Effectively this makes a debug build to have the libraries compiled as optimized
as possible. And it’s important because ggez and all the dependencies that it
pulls are related to graphics. And graphics are intensive operations. While
developing, we will need those to be as fast as possible.
However, our code will be still compiled fully in debug mode. This means that compilation times will be fast, and it will detect most of the errors at runtime properly.
For now, proceed to build it. This will take a long time so make a cup of tea:
$ cargo build
This will download a lot of libraries and compile them. Because of the amount of stuff that needs to be built, expect 10 minutes of compilation time.
Remember, these dependencies will be built in almost release mode. Building in release takes more time.
Once it is built, we can go ahead and start some coding.
The first window
The setup phase is a bit large, so please trust me for a minute.
On main.rs copy the following contents:
mod game; use ggez::conf::{NumSamples, WindowMode, WindowSetup}; use ggez::event; use ggez::ContextBuilder; use game::SpaceRecyclerGame; const WIDTH: f32 = 1200.0; const HEIGHT: f32 = 600.0; const MARGIN_W: f32 = 15.0; fn main() { let window_cfg = WindowSetup { title: "Space Recycler".to_owned(), vsync: false, samples: NumSamples::Four, ..Default::default() }; let window_mode = WindowMode { width: WIDTH, height: HEIGHT, maximized: false, resizable: false, visible: true, resize_on_scale_factor_change: false, ..Default::default() }; // Make a Context. let (mut ctx, event_loop) = ContextBuilder::new("space_recycler", "Cool Game Author") .window_setup(window_cfg) .window_mode(window_mode) .build() .expect("aieee, could not create ggez context!"); // Create an instance of your event handler. // Usually, you should provide it with the Context object to // use when setting your game up. let space_recycler = SpaceRecyclerGame::new(&mut ctx).expect("Error intializing game"); // Run! event::run(ctx, event_loop, space_recycler); }
We need to create another file game.rs with the following:
#![allow(unused)] fn main() { struct SpaceRecyclerGame { // Your state here... } impl SpaceRecyclerGame { pub fn new(_ctx: &mut Context) -> SpaceRecyclerGame { // Load/create resources such as images here. MyGame { // ... } } } impl EventHandler for SpaceRecyclerGame { fn update(&mut self, _ctx: &mut Context) -> GameResult<()> { // Update code here... Ok(()) } fn draw(&mut self, ctx: &mut Context) -> GameResult<()> { graphics::clear(ctx, Color::BLACK); // Draw code here... graphics::present(ctx) } } }
If we execute cargo run now, that should present us with a black screen.
The compilation time now it should be quite fast.
There’s a lot here. Let’s dissect step by step.
Level: Master
Well, well… here we are.
Look what you’ve done so far. Those programs look quite like the real deal!
Yet, the journey continues. Now it’s time to get in-depth to what coding is.
With this part, you should be ready to get a job in programming or contribute in the Rust community.
Borrowing
This is most probably the most difficult concept in Rust. Borrowing is very specific to Rust only, and it’s the main reason so many people abandon learning Rust. And also it is why so many people say Rust is difficult.
Learning this is what sets apart developers from Rust Developers.
Are you ready?
- When you see things like
x,y,f64, etc. It means that you own the variable, meaning that you can do whatever: read, write and free their memory. - If you see
&x,&y,&f64, etc. Means that you don’t own it, it was lent to you temporarily. You can only read their contents, but most of the time you can also copy the contents elsewhere too. - Finally, if you see
&mut x,&mut y,&mut f64, etc. Is as before, but you can also write to them. With these you can do mostly everything except free their memory.
That’s it. & is read-only access, &mut is read and write access, and if
nothing appears, it’s full access.
Wait, you thought this was going to be more difficult? I wonder why.
Ok, jokes aside, now comes the difficult part.
Rust will ensure the correctness of our programs in a way that feels “too much”, it will analyze and prove correctness to a level that no other language that I know does.
This makes the Rust compiler very picky. There’s lots of stuff that it doesn’t like. And it’s hard to make the compiler happy.
Maybe you experienced this already. Or maybe I did a good job up to now keeping you away from this. Now it’s time to start introducing (very gently) to Ownership and Borrowing in Rust.
When we store a value into a variable, it uses some amount of memory of the computer. It seems kinda obvious that 100 numbers will use more memory than 5 numbers.
And memory needs to be freed. Because if we keep asking for memory and never returning it, our computer might run out of memory at some point.
Therefore, Rust must allocate (ask for memory) when we put a new variable, and it must free the memory when it’s no longer needed.
fn some_function() { let x: i64 = 12345; // <-- memory gets allocated here. println!("using the variable: {}", x); } // <-- memory gets freed here, when the function ends. fn main() { some_function(); }
Now, this is the basic of what Ownership means: when we create something, we own it, and we’re responsible for freeing it when we’re done with it.
Rust does this for us in a very natural way. So much that we could ignore this up to this point.
The problem with this approach is that, when we pass a variable to a function, the function now owns that variable. And this means that the function will free this variable when it ends, we could not use it anymore.
Sounds weird, but it will seem clear here:
fn print(x: i64) { // <-- x ownership is captured when calling the function. println!("Value is: {}", x); } // <-- memory gets freed here, when the function ends. fn some_function() { let x: i64 = 12345; // <-- memory gets allocated here. print(x); // <-- we call the function, but 'x' is now owned by 'print'. println!("using the variable: {}", x); // <-- 'x' no longer exists!! } fn main() { some_function(); }
But —I hear you asking—, if I run the above code it works.
Yeah, I know. But this one does not:
fn print(x: String) { // <-- x ownership is captured when calling the function. println!("Value is: {}", x); } // <-- memory gets freed here, when the function ends. fn some_function() { let x: String = "text".to_string(); // <-- memory gets allocated here. print(x); // <-- we call the function, but 'x' is now owned by 'print'. println!("using the variable: {}", x); // <-- 'x' no longer exists!! } fn main() { some_function(); }
Some data types are so simple that Rust can just copy them around. But text in the other hand, is a bit more complicated and that trick no longer works1.
Now, to make this work is pretty easy. Because print() is only reading, we
only need read-only access. We can use the ampersand to borrow temporarily
the variable:
fn print(x: &String) { // <-- we only get a "reference" to 'x'. We don't own it. println!("Value is: {}", x); } fn some_function() { let x: String = "text".to_string(); // <-- memory gets allocated here. print(&x); // <-- now we only lent 'x'. We keep ownership. println!("using the variable: {}", x); // <-- 'x' does exist here and works. } // <-- 'x' memory gets freed here. fn main() { some_function(); }
As you can see, I only added two & in the code, and we don’t have the
problem anymore.
Now we also have &mut, and this one is fascinating. It allows us to
do this:
fn add_five(x: &mut i64) { x += 5 } fn some_function() { let x: i64 = 100; println!("x = {}", x); add_five(&mut x); println!("x = {}", x); add_five(&mut x); println!("x = {}", x); } fn main() { some_function(); }
Because add_five receives a mutable reference, when we change it, we will see
the changes appear on some_function.
I think you can see this is super useful, and our functions got now superpowers!
Let’s step this up a little.
Turns out you can also store references like &x or &mut x. And for what
reason do we want to do this? Well… it’s too early to explain. Let’s just say
that it is possible, and you don’t want to do this.
#![allow(unused)] fn main() { let mut x = 5; let y = &mut x; *y = 3; println!("x = {}", x); }
Also in structs:
#![allow(unused)] fn main() { struct Thingy { x: &mut i64, y: &f64, } }
But this must be written as:
#![allow(unused)] fn main() { struct Thingy<'a> { x: &'a mut i64, y: &'a f64, } }
The point is: it is possible. And I need you to know that this can be done to understand the next explanation.
But at your current level, if you see yourself coding something like that,
simply back off and find a way to avoid storing references &var &mut var.
They’re very painful to work with.
Now, this means that there may exist several pieces of code that have access to the same variable at the same time via different methods.
And this is a problem.
If one part of a program is using a variable and another part, inadvertently is changing the variable… well, it can end very badly.
For this reason, Rust limits how ownership and references can coexist, and how many we can have.
- Ownership (
var): There can be only one owner at a time. When we call a function, we transfer the ownership of the variables unless they are references&x&mut x. - Mutable reference (
&mut var): There must be at most one&mut varat any time. And while it exists, the original variable cannot be read or written (more or less). - Shared reference (
&var): There can be many, but they cannot coexist with&mut var.
In other words, there must be always one owner, and one writer. Readers can be many, as long as there aren’t anyone writing.
The ownership system in Rust can be related with having a car:
var: You own a car, therefore you can choose to dispose of it at any time.&mut var: You send the car to a mechanic, they can do changes to your car, but you cannot use it meanwhile. And you cannot dispose of it while is on the mechanic.&var: You let others see your parked car, but not touch it. Many can see your car at the same time, but meanwhile you cannot use it or send it to the mechanic.
Which roughly translates into:
struct Car { horses: i64, air_conditioner: bool, } fn buy_cheap_car() -> Car { return Car{horses: 60, air_conditioner: false}; } impl Car { // "self" here transfers ownership. And this function will free the variable. fn dispose(self) { println!("Bye car! {} horses, A/C:{}", self.horses, self.air_conditioner); } // "&mut self" gives exclusive write access. fn upgrade_ac(&mut self) { self.air_conditioner = true; } fn upgrade_engine(&mut self) { self.horses += 10; } // "&self" gives shared read access. fn admire(&self) { println!( "Woo, nice car with {} horses and {} A/C", self.horses, self.air_conditioner ); } } fn main() { let mut mycar = buy_cheap_car(); let admirer1 = &mycar; admirer1.admire(); let mechanic = &mut mycar; mechanic.upgrade_ac(); let admirer1 = &mycar; let admirer2 = &mycar; // mechanic can't be used here. admirer1.admire(); admirer2.admire(); let mechanic = &mut mycar; mechanic.upgrade_engine(); let admirer1 = &mycar; let admirer2 = &mycar; admirer1.admire(); admirer2.admire(); mycar.dispose(); // Car no longer exists, this won't work: // let admirer1 = &mycar; // admirer1.admire(); }
I know that at this point this will feel confusing. It’s a lot to unpack.
And I guess you have questions like:
- Why should I use this?
- Seems complicated.
- Why not use
&mutall the time? Or just the regularvar. - Is this to put restrictions on the code?
No, no… forget about all those thoughts.
It’s not something we want to use, it’s something that we will need to use. Meaning, that the usage will be apparent soon enough. Don’t overthink it.
We’re trying to solve a problem here. The problem is sharing variables across many pieces of code.
Before, we were doing lots of things like:
#![allow(unused)] fn main() { let p: Point2D; // (...) p = p.move(distance_vector); }
But this is inconvenient. And we would like to just write:
#![allow(unused)] fn main() { let p: Point2D; // (...) p.move(distance_vector); }
And that should update the point.
For that, we want to use &mut self instead. So, we had:
#![allow(unused)] fn main() { impl Point2D { fn move(mut p: Self, v: Vector2D) { p.x += v.dx; p.y += v.dy; return p; } } }
With what we learned, we can do:
#![allow(unused)] fn main() { impl Point2D { fn move(&mut self, v: Vector2D) { self.x += v.dx; self.y += v.dy; } } }
And now that updates the point. Nice.
Still one problem. If we do:
#![allow(unused)] fn main() { let mut p1 = Point2D{x: 10.0, y: -5.0}; let mut p2 = Point2D{x: 5.0, y: 15.0}; let distance_vector = Vector2D{dx: 50.0, dy:0.0}; // (...) p1.move(distance_vector); p2.move(distance_vector); }
The second move, for p2 won’t work. The problem is that move is taking
ownership of distance_vector, so we lose the variable.
But we don’t need ownership just for reading the contents, do we?
So let’s update that:
struct Point2D { x: f64, y: f64, } struct Vector2D { dx: f64, dy: f64, } impl Point2D { // Added ampersand v---- here fn translate(&mut self, v: &Vector2D) { self.x += v.dx; self.y += v.dy; } } fn main() { let mut p1 = Point2D{x: 10.0, y: -5.0}; let mut p2 = Point2D{x: 5.0, y: 15.0}; let distance_vector = Vector2D{dx: 50.0, dy:0.0}; // Added ampersand // v---- here p1.translate(&distance_vector); p2.translate(&distance_vector); }
With just that single & character, now it works.
I’ll leave this here. Take it as an introduction into borrowing and ownership. Later on we will revisit this topic a bit more in-depth. So if it’s not fully clear, don’t worry!
Also, we’re reaching a point where you can already read (and probably write) what could be production-ready Rust code. This is (almost) what real code looks like. You’re getting close to be able to start your own applications!
If you ever asked yourself why all code samples and exercises I wrote almost always had number variables, this is the reason. They’re easier to work with and avoids these problems.
Level: Grand Master
Last steps! This section is what makes a programmer a great one!
Will go through the most complex parts of coding and see more challenging programs.
What is a Garbage Collector?
It’s something that Rust doesn’t have. Have a good day!
Garbage Collector is about memory allocation. In C & C++ memory needs to be manually requested and freed. Because this is very dangerous, most other languages automatically allocate and free.
Allocating is “easy”, as the first use is allocating. But automatic free is hard, because you need to ensure that no parts of the program can access that variable anymore.
So a Garbage Collector is a system that can track when variables go out of scope (unreachable) in order to free the memory. There are lots of types of GCs (each language might use a different approach), but they tend to have performance penalties, memory over-consumption and may temporarily halt all threads of the program to do the free.
- In Python, the GC prevents Python from running several threads of python code in parallel. So most python code, even if it uses threads, effectively is single-threaded because of the GC.
- In Java, the GC tends to free memory very late, causing bloat, a lot of memory consumption.
- In Go, the GC causes micro-pauses. All threads suddenly stop for a few milliseconds to clean up.
- In Rust, there’s no GC. Instead, the automatic free is computed at compile time (by static analysis). So no bloat, no performance penalty.
- C & C++, there’s no GC, you do it manually, and a mistake causes memory corruption and segfaults.
Rust is kind of a compiler assisted C++. Automatic like Python, but if the compiler cannot prove your program is correct (even if the program in fact IS correct), it will reject it and won’t compile.
So the drawback from Rust approach is the added difficulty of learning Ownership & Borrowing (which I talk about in my blog post) ….
Level: Legendary
Wait, do you want more?
Maybe you already surpassed the teacher.
Appendices
Appendix A. License of this book
This text is licensed under the Creative Commons license “Attribution 4.0 International (CC BY 4.0)” which can be read here:
https://creativecommons.org/licenses/by/4.0/
https://creativecommons.org/licenses/by/4.0/legalcode
Appendix B. Caveats and challenges in this book
This book is intended to people with no previous experience in coding at all and attempts to teach programming in a very approachable way.
Because of this, a lot of information is hidden, misrepresented, or factually incorrect. It is needed to hide and oversimplify stuff, so new learners don’t get overloaded with information. This also helps the reader to create their own programs very early on without needing to have a proper understanding, which can come in later on.
Other books might put a lot of theory in front to give a good understanding of what is coming next, but theory is indeed boring until it’s put into use. In this book I try to push down the theory as far as possible.
If this approach is good or bad it’s certainly subjective. But as everyone else goes for a more academic way, and there is almost no one that does something like I do in this book, I think it’s good to add more choices for learning.
Appendix C. Exercises and Solutions
Appendix D. Proposed projects
Some ideas to build as a beginner!
- Unit convertor - changes cm to m, yards to miles, °C to °F, etc.
- Expense tracker / Lending tracker (see how much you owe to your friends and settle)
- Horizontal Shooter game (maybe about cleaning space and recycling)
Appendix E. Rust compared to other languages
-
Rust has structs and impl.
- C++, Java, Python, JavaScript have classes.
- C doesn’t have classes, but it has structs.
- However, no function methods can be placed.
-
Rust has generics
- C++ and Java have it too.
- C and Python do not.
- Python doesn’t need it.
- Go is adding them.
-
Rust has traits
- Java and Go have interfaces.
Features unique to Rust
-
The fact that by default variables are not mutable. In other languages you have to specify “const” to get the opposite effect.
-
Move by default instead of Copy.
-
Ownership and Borrowing.
-
No Garbage Collector and no manual memory management (At the same time)
- C/C++ have no GC, but manual memory allocation.
- Almost every other language has a GC.